If you are looking for an open source alternative to Roam Research, TiddlyWiki is your best bet. Because it’s self-hosted—meaning you keep your data private—it may seem a bit more daunting to get started. So here is a guide which will take you from complete beginner to completely in love with TiddlyWiki in three steps. As with all my guides, expect detailed explanations. I will never assume anything is obvious. Okay, let’s get started.
If you have any questions during this tutorial, please post it here. I’ll do my best to come back to you as soon as possible, but other members of the TiddlyWiki community may be able to jump in before I do.
0. What is TiddlyWiki?
TiddlyWiki is a non-linear note-taking tool. It’s been around for about 15 years! The magic of TiddlyWiki resides in metaprogramming. A new note can modify the behaviour of TiddlyWiki itself. For example, if I find myself repeating an action quite often, I can create a dynamic TiddlkyWiki note (which are called “tiddlers”) to add a button to the TiddlyWiki interface so I can click it and perform that action easily.
Because it’s so modular, there is no limit but your imagination to what you can do with TiddlyWiki. It’s a free, open-source, and self-hosted alternative to many of the paid, proprietary note-taking tools you may be using at the moment.
It does require a bit more tinkering and it’s missing some features out of the box, so if you want something that just does the job and already lives in the cloud, it may not be for you. In any case, if you’re curious, this tutorial should not take you more than 30 minutes and will give you a good overview.
1. Install TiddlyWiki
Let’s first have a quick look at what TiddlyWiki is all about. Click here to go on the official TiddlyWiki website, and click on the big green “Download empty” button to get yourself a fresh copy of TiddlyWiki.
If you expected a massive archive to unzip and many files to install, I’m sorry. What this green button will download is just one single HTML file called empty.html. Rename it mywiki.html. Click on that file to open it in your browser. You will be greeted by the starting page of TiddlyWiki.
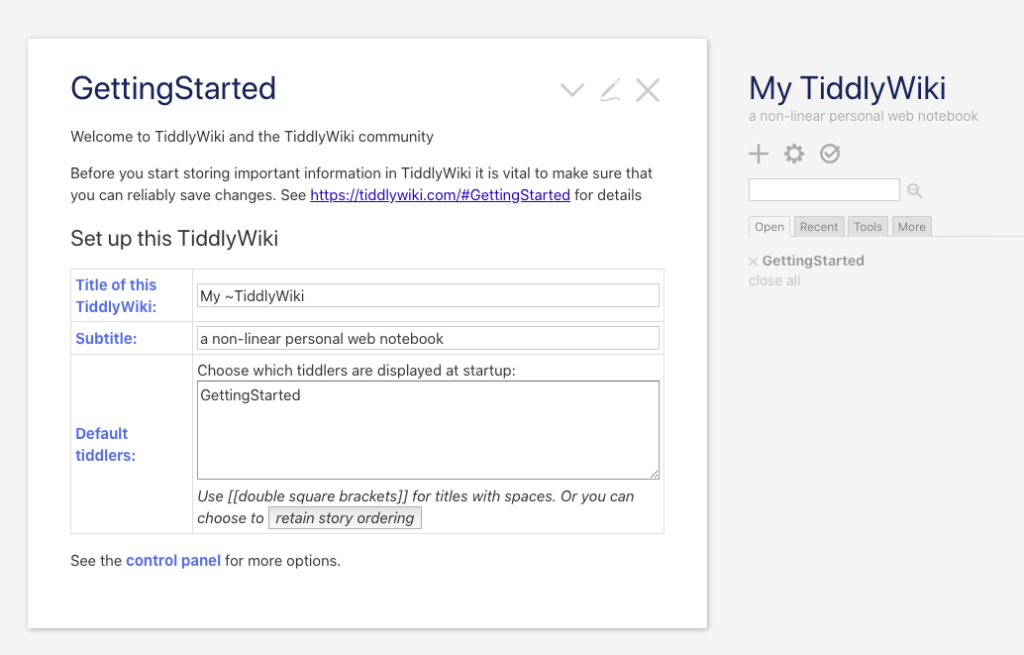
Give it a name (“Jack’s notes” or “Rachel’s thoughts”) and feel free to leave the subtitle empty. No need to change the default tiddlers that are displayed at startup. You can always change all of this later and we’re only poking around at this stage, so don’t worry about it for now.
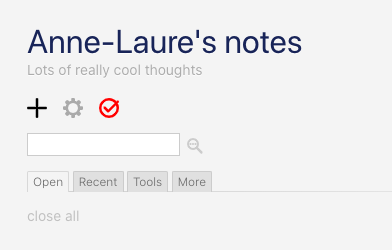
Now, click on the “+” sign in the right hand side, just below your wiki’s name.
This will open what TiddlyWiki calls a new “tiddler”—which is effectively a note.
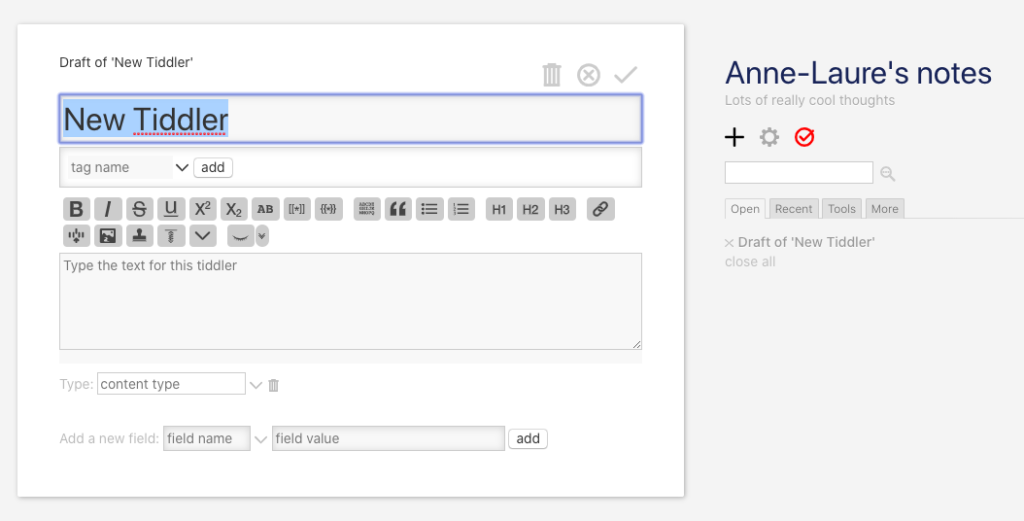
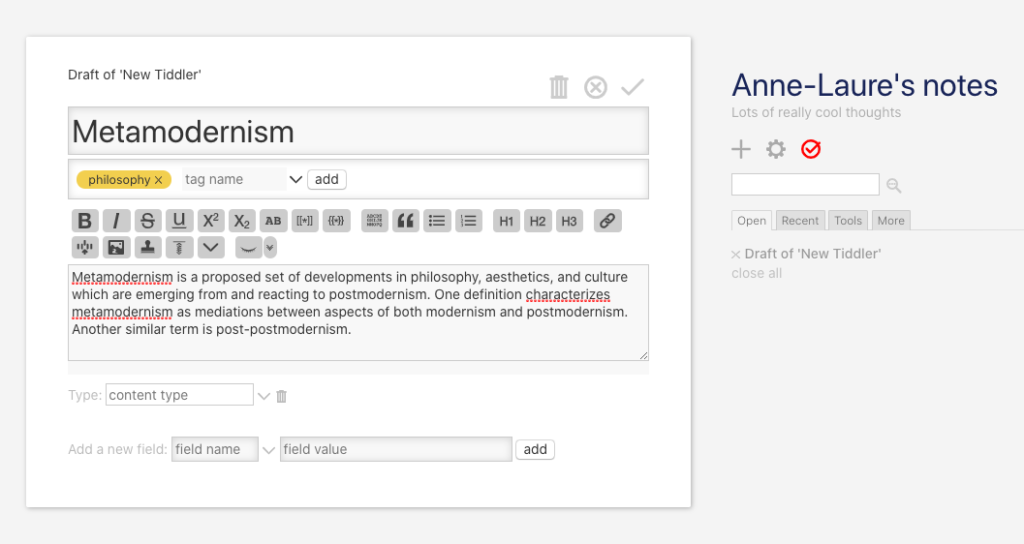
Type “Metamodernism” as your title. Then go and Google “metamodernism”, and open the corresponding Wikipedia page. Paste the first paragraph from the Wikipedia page into the text area in TiddlyWiki. Now type “philosophy” as a tag. You should end up with something that looks like this:
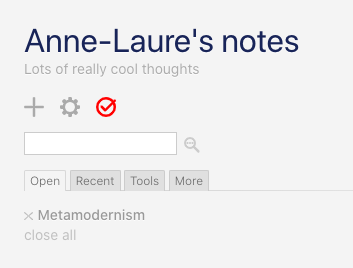
Click on the check mark in the top right corner of the note (or “tiddler”) to save it. You will notice two things change in the right-hand side menu. First, your note is now listed under the list of open tiddlers. Second, there is a red icon next to the settings icon. This is to let you know there are unsaved changes.
Click on that red icon, and two more things will happen. First, it will download a new version of the mywiki.html file, usually called mywiki(1).html. Second, the icon will switch back to light grey, indicating you have now saved your changes.
This is pretty cool, but saving a new HTML file with a new name every time we take some new notes can be pretty annoying and things can get messy in our Downloads folder.
Here are some of the solutions I explored:
- Install a browser extension. The savetiddlers extension for Chrome and Firefox allows you to save your wiki to a specific folder inside the Downloads folder.
- Use a Google Drive add-on. TiddlyDrive is an add-on for Google Drive that allows TiddlyWiki files stored there to be opened and saved directly.
Until I discovered Note Self by Danielo Rodríguez. Remember how I told you TiddlyWiki was extremely modular? Note Self is a modified version of TiddlyWiki which does a few really cool things, but for now we will just be grateful for the ability to autosave without installing anything else.
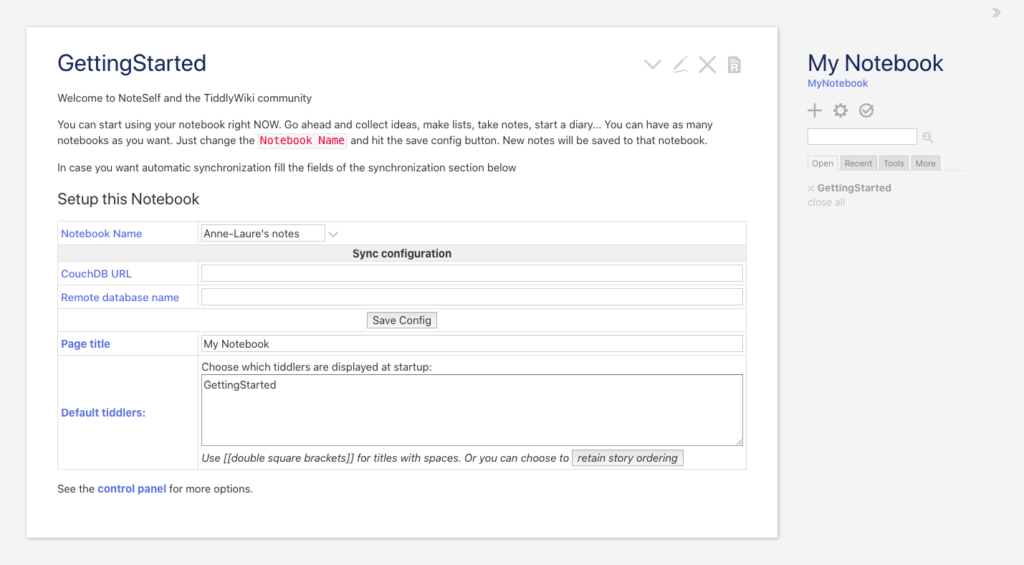
Go to the Note Self website, click download, rename noteself.html to mynewwiki.html and move it to the folder where you want your wiki to live, for example Documents/wiki/mynewwiki.html.
Now, open it and change the name and description of your wiki as we did before. You can ignore the database stuff. To make it seamless to use your wiki, I recommend bookmarking it in your browser as well.
Note Self uses your browser's cache to save your notes as you type them, so please make sure to periodically back up your data. Click on the same "save" button and it will export your wiki and its database.
You can safely delete the other copies of the vanilla version of TiddlyWiki we downloaded before (the ones named mywiki.html and mywiki(1).html).
2. Upgrade TiddlyWiki
Let’s take our wiki from a Skoda to a Lamborghini. Because it’s open source and has a great community of contributors, you’ll be able to add lots of cool functionalities to your wiki with a couple of drag and drops.
- Add TiddlyBlink. In the words of its creator Dave Gifford, TiddlyBlink is “TiddlyWiki with bi-directional linking”—sounds exactly like what we need. Click here and drag the “tb” yellow pill into your own TiddlyWiki. The easiest way to do this is to have them both open side by side. See the gif above for a demo. This is probably TiddlyWiki’s most powerful feature: you can add new functionality to your knowledge management system just by creating new dynamic notes or dragging someone else’s dynamic notes into your notebook. So, drag this into your own TiddlyWiki, click on import, save, and refresh the page. Congratulations, you now have bi-directional linking and links autocomplete in your wiki.
- Use TiddlyBlink. We’ll have a more detailed look later, but let’s just have a quick peek now. From now on, when you create a new tiddler, you can use [[ ]] to look for existing pages or to create new pages. You can also highlight existing words in your tiddler and click the [[*]] button to add double brackets around them. TiddlyBlink includes an automatic renamer, so if you change the title of a note, this will automatically change the name of any links to that note found in other notes. You can click the little clock-shaped icon to create daily notes with the current date and time (very practical for quick on-the-fly thoughts where you don’t want to think about a title). TiddlyBlink is a very powerful tool which reproduces lots of Roam’s features.
- Add markdown support. If like me you’re used to typing your notes in markdown, you can install this little plugin. Say hello to easy formatting, including tables, embedded images, checkboxes, and inline code with backticks.
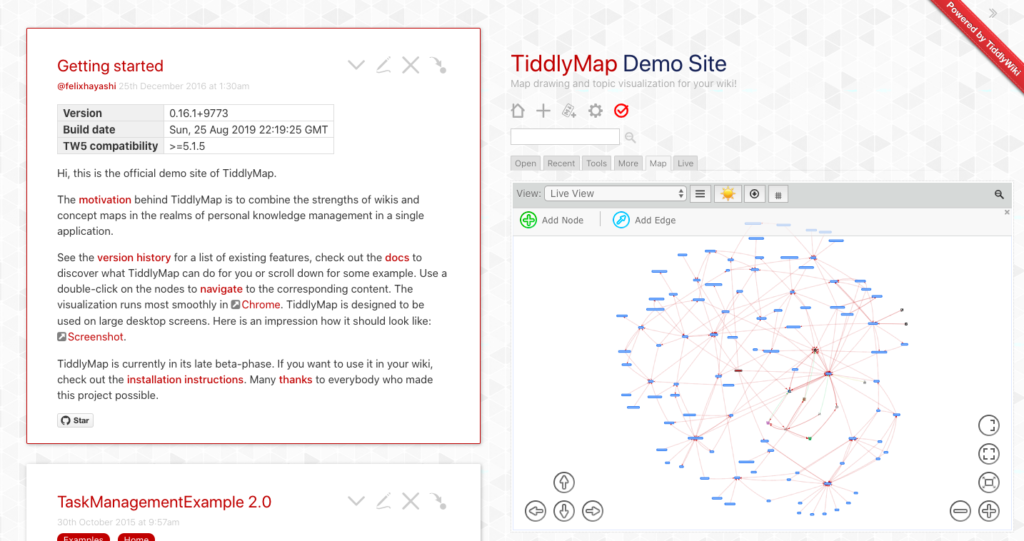
- (optional) Add TiddlyMap. One feature many people love in Roam is the knowledge graph. If you want a live map of your nodes, you can install TiddlyMap. Go to the installation instructions, then drag the links specified in the guide into your installation of TiddlyWiki, in the right order. This is the same process we used to drag the “td” pill to install TiddlyBlink. Drag, click import, save, refresh. Click on “live view” and you should now see a map of your notes.
You can give it a try first on the TiddlyMap website.
Great job, you now have your own self-hosted non-linear note-taking tool! In the next section, we will cover some of the basics of using TiddlyWiki to take networked notes and build your own knowledge database.
3. Learn the basics
If you’re intimate with Roam, many of the features of this installation will feel familiar. Let’s go through the most important ones.
- Link to new or existing notes. Use [[*]] to look up existing pages. If the page doesn’t exist, it will be created on the fly thanks to TiddlyBlink. You can use [[in-text way of referring to a note|Actual title of the note]] so your notes flow better.
- Transclude content from other notes. This installation supports transclusion. Use {{*}} to include another note. Please be aware that in TiddlyWiki’s philosophy, the tiddler is the atomic bit of information, so you won’t have access to data at the “block” level as you would in Roam. It makes for a slightly different approach to note-taking. If you’re a heavy user of the block feature in Roam, it will significantly impact your workflow.
- Take quick notes. In Roam, you have a “daily” note feature which automatically has today’s date as the title. In TiddlyWiki, you could take such notes every single minute! Click the little clock icon to create a note with the current timestamp. Thanks to Note Self, you also have access to past revisions by clicking on the top-right corner of any note.
- Tag your notes. This is a nice feature of TiddlyWiki. I personally have notes for “people”, “books”, “papers”, and “concepts.” You could even go deeper, and for instance tag people as “friends”, “family” or “colleagues.” If you rely heavily on tagging and creating particular concepts to bind your notes, you may want to have a look at Idea Stew for TiddlyWiki, which makes it easier and faster to do so.
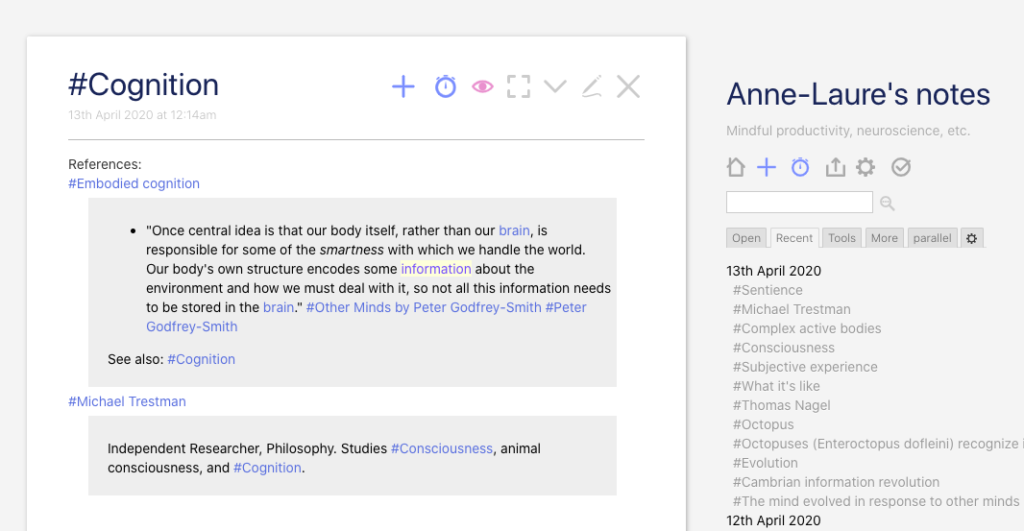
- Navigate your notes. Thanks to TiddlyBlink, each note will have a list of backlinks (“References”) at the bottom of the page. You can also use the right-hand side panel to look at recent notes, open notes, or search by tags. If you click on the eye icon, you can decide how these references will be displayed.
- Search your notes. The sidebar has a search box that’s super easy to use. Clicking on the magnifying glass icon will give you access to advanced search features with many filter operators.
- Organise your notes. There are many ways to organise your notes. For example, you can create dedicated pages and use some filters, for example <<list-links filter:”[tag[Philosophy Books]]”>> to list all content related to philosophy books.
- Share your notes with others. You may want to share a particular note or your whole wiki. TiddlyWiki makes both very easy. First, because your wiki is just one file, you could simply send the whole HTML file over email to someone. They would just have to open it in their browser to interact with it. But, realistically, you probably will want to only share one note. Here are a variety of ways you can do so, including in simple text format.
You’re now good to go! There are many saving and backup options I am not going to get into for this beginner tutorial. The easiest is probably just to upload your HTML file to Dropbox or Google Drive, but you can automate it and even connect TiddlyWiki to a database in the cloud. If you’re struggling, there is an amazingly supportive community here.
And if you want to take it up a notch, you can even start using TiddlyWiki as a static website generator. This is what I use for my digital garden. Have fun!