Tana is a powerful tool for thought that allows you to easily turn raw notes into tasks. Its goal is to end context switching and copy-pasting, so you can accomplish all of your goals from an all-in-one workspace.
You can start experiencing the power of Tana by creating a simple solo workflow for task management. But Tana also makes it simple to collaborate in teams. Follow this tutorial to learn how to manage your tasks as a team with Tana.
How to manage tasks as a team with Tana
Managing your tasks as a team with Tana is as easy as one, two, three. You only need to create a new workspace, decide which workspace tags you’ll use, create shared tags, and set up a team workflow.
Step 1. Create a new workspace and decide which workspace tags you’ll use.
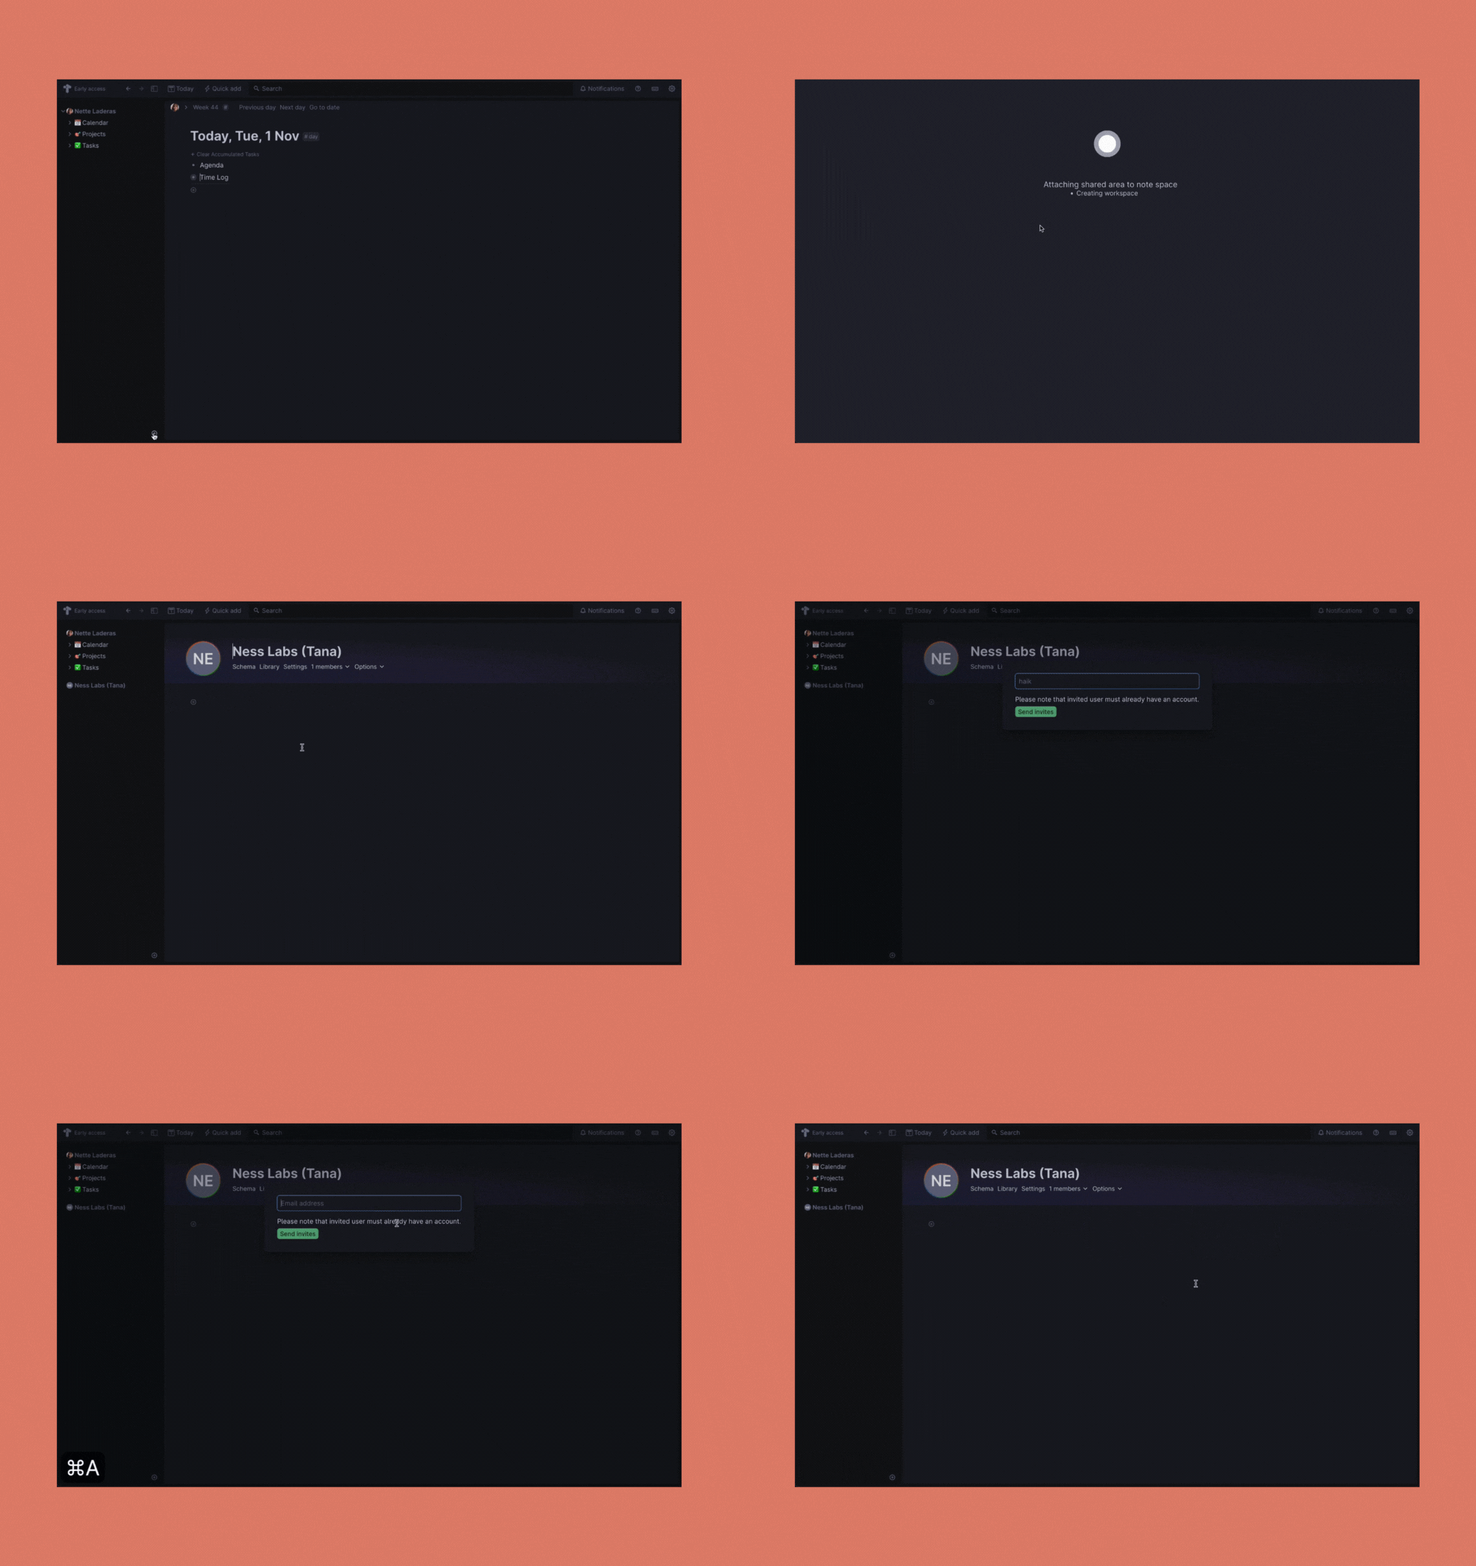
You can accept invitations to other workspaces by clicking the plus symbol at the bottom of the sidebar, or you can create your own workspace. By navigating to “Options” and clicking on the “Allow content from…” section, you can choose which workspace tags you want to utilize.
Step 2. Create shared tags.
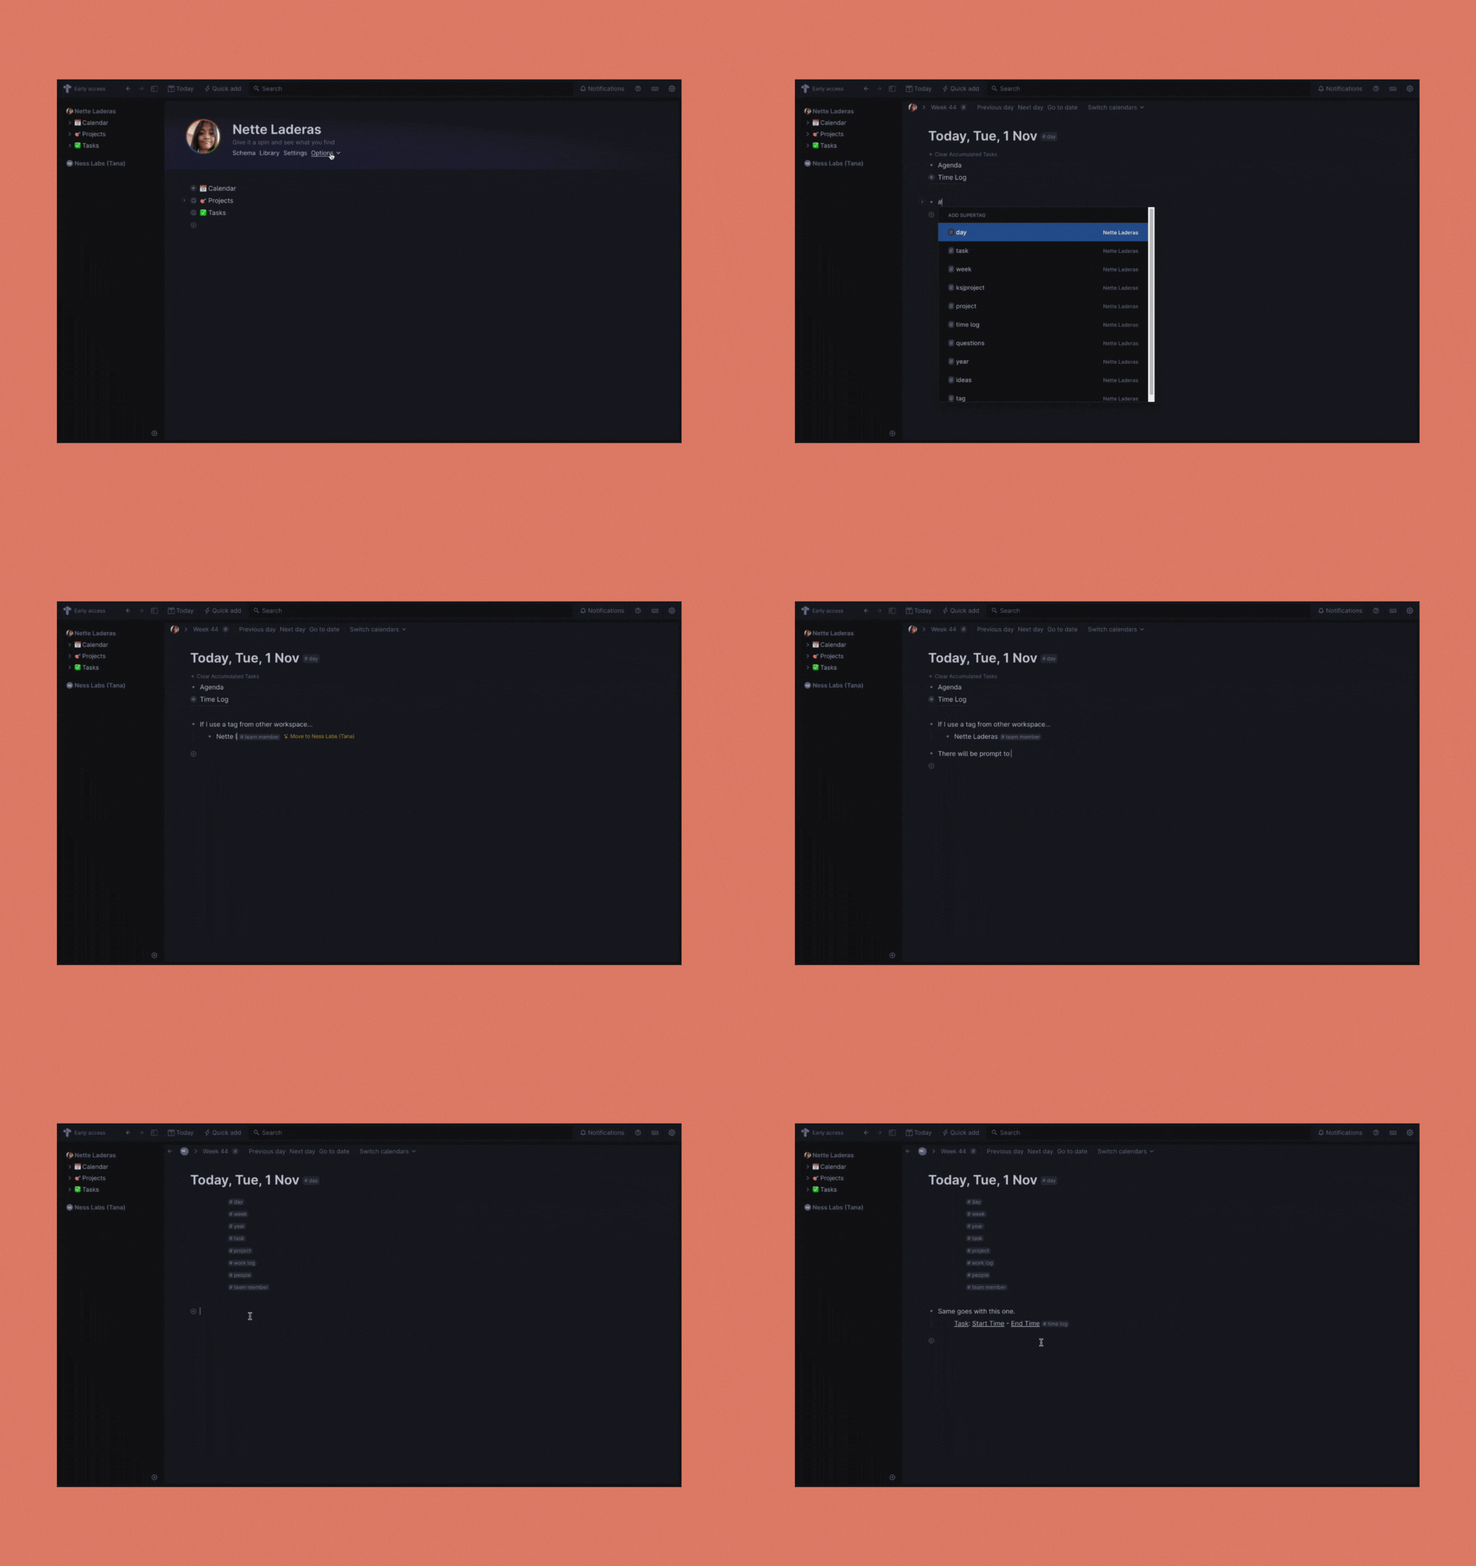
It’s best to create the super tags in the workspace where you want the data to live in order to deal with different workspaces successfully. However, if you create a tag in your personal space and attempt to use it in a workspace, only you will be able to view it. You can still utilize tags from other workspaces.
You can add nodes that have shared tags after creating them in your personal workspace or in the shared workspace itself. Since you can write everything out first and then submit it to the workspace when you’re ready to share it, this is really useful. The node is being suggested to be moved to the shared workspace, as you’ll see.
With the “Move to” command, nodes can also be moved to different workspaces.
Step 3. Set up a team workflow.
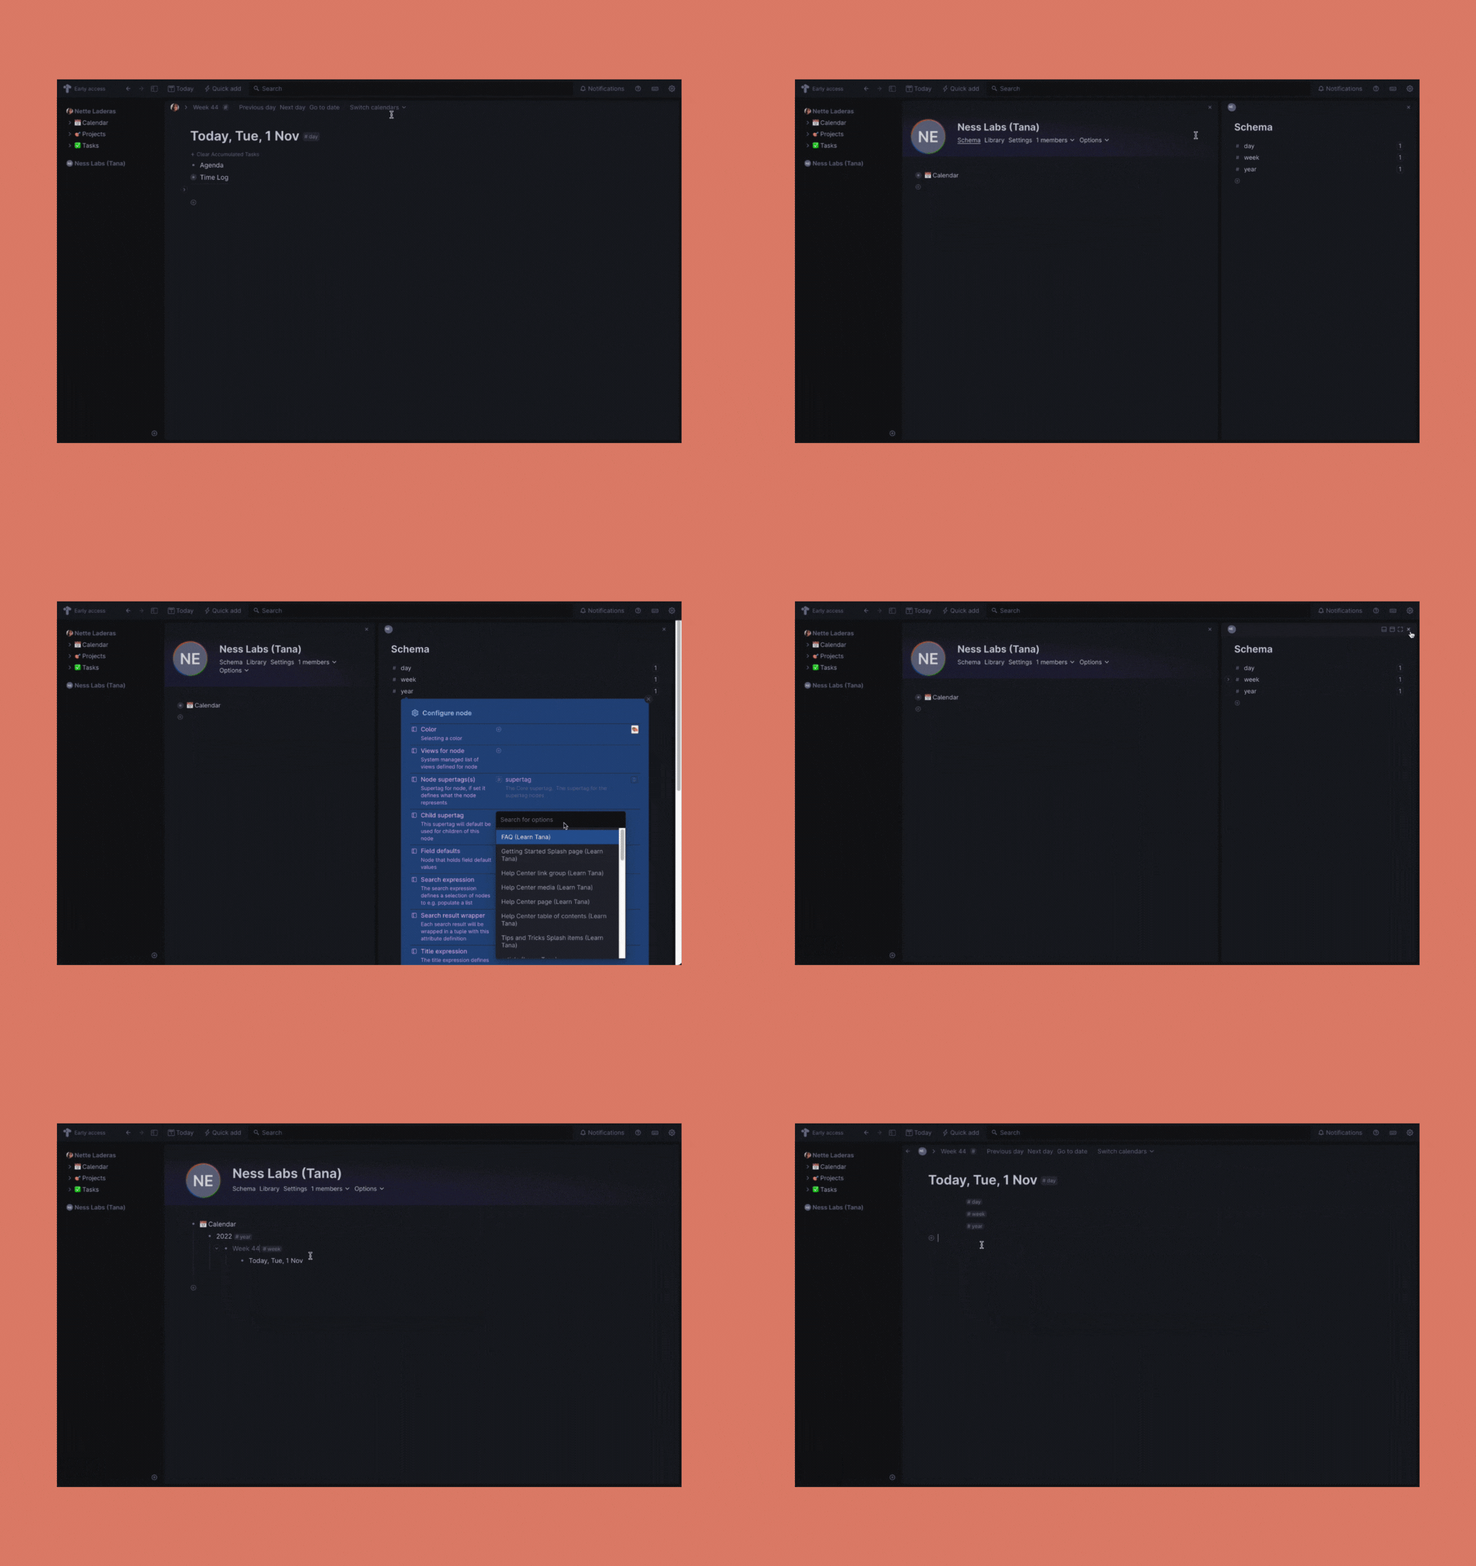
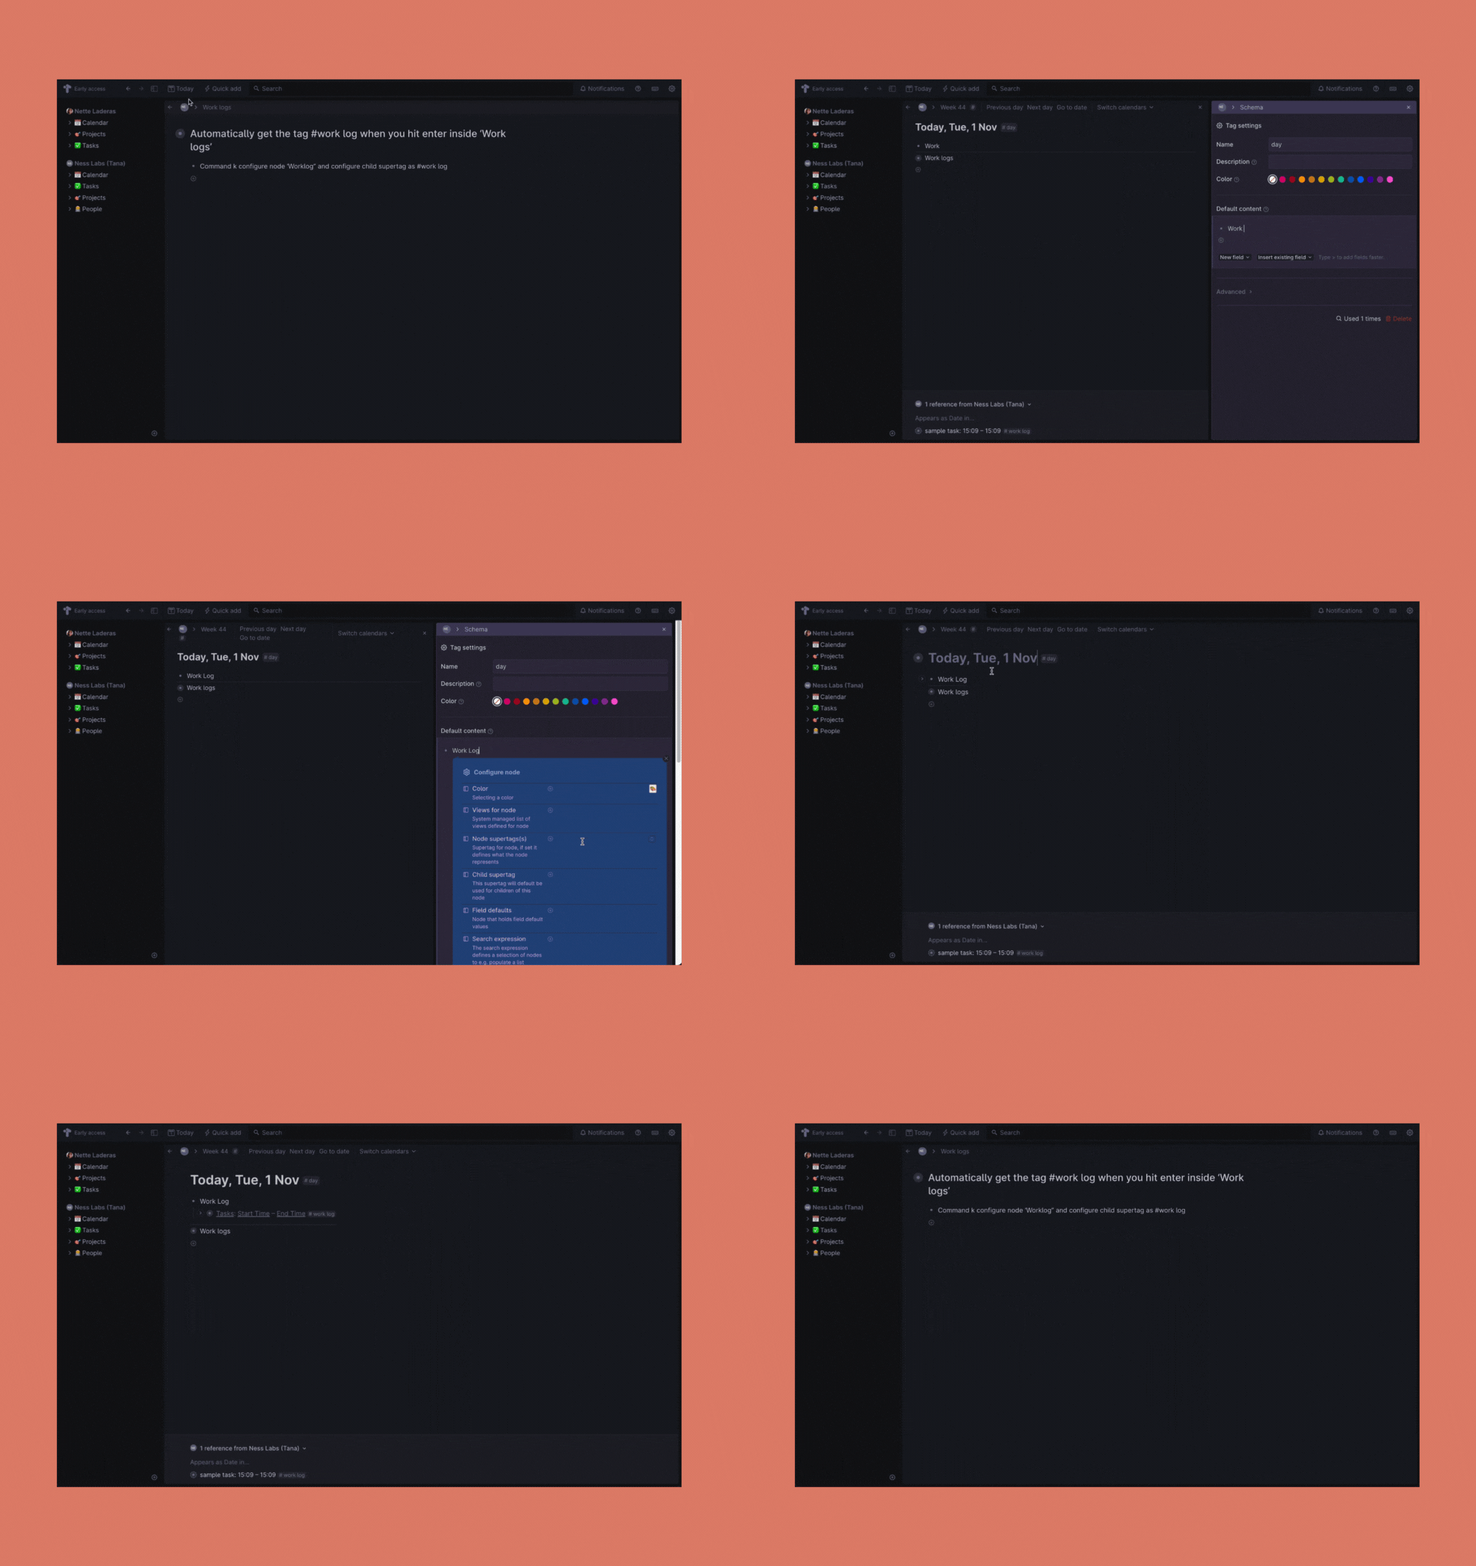
Set up calendar tags. Since a new workspace doesn’t come with a built-in calendar, you must create calendar tags to make this feature available. On the today page of your new workspace, enter #day, #week, and #year. Set up the child supertags #week and #day for the supertags #year and #week’s legacy, respectively.
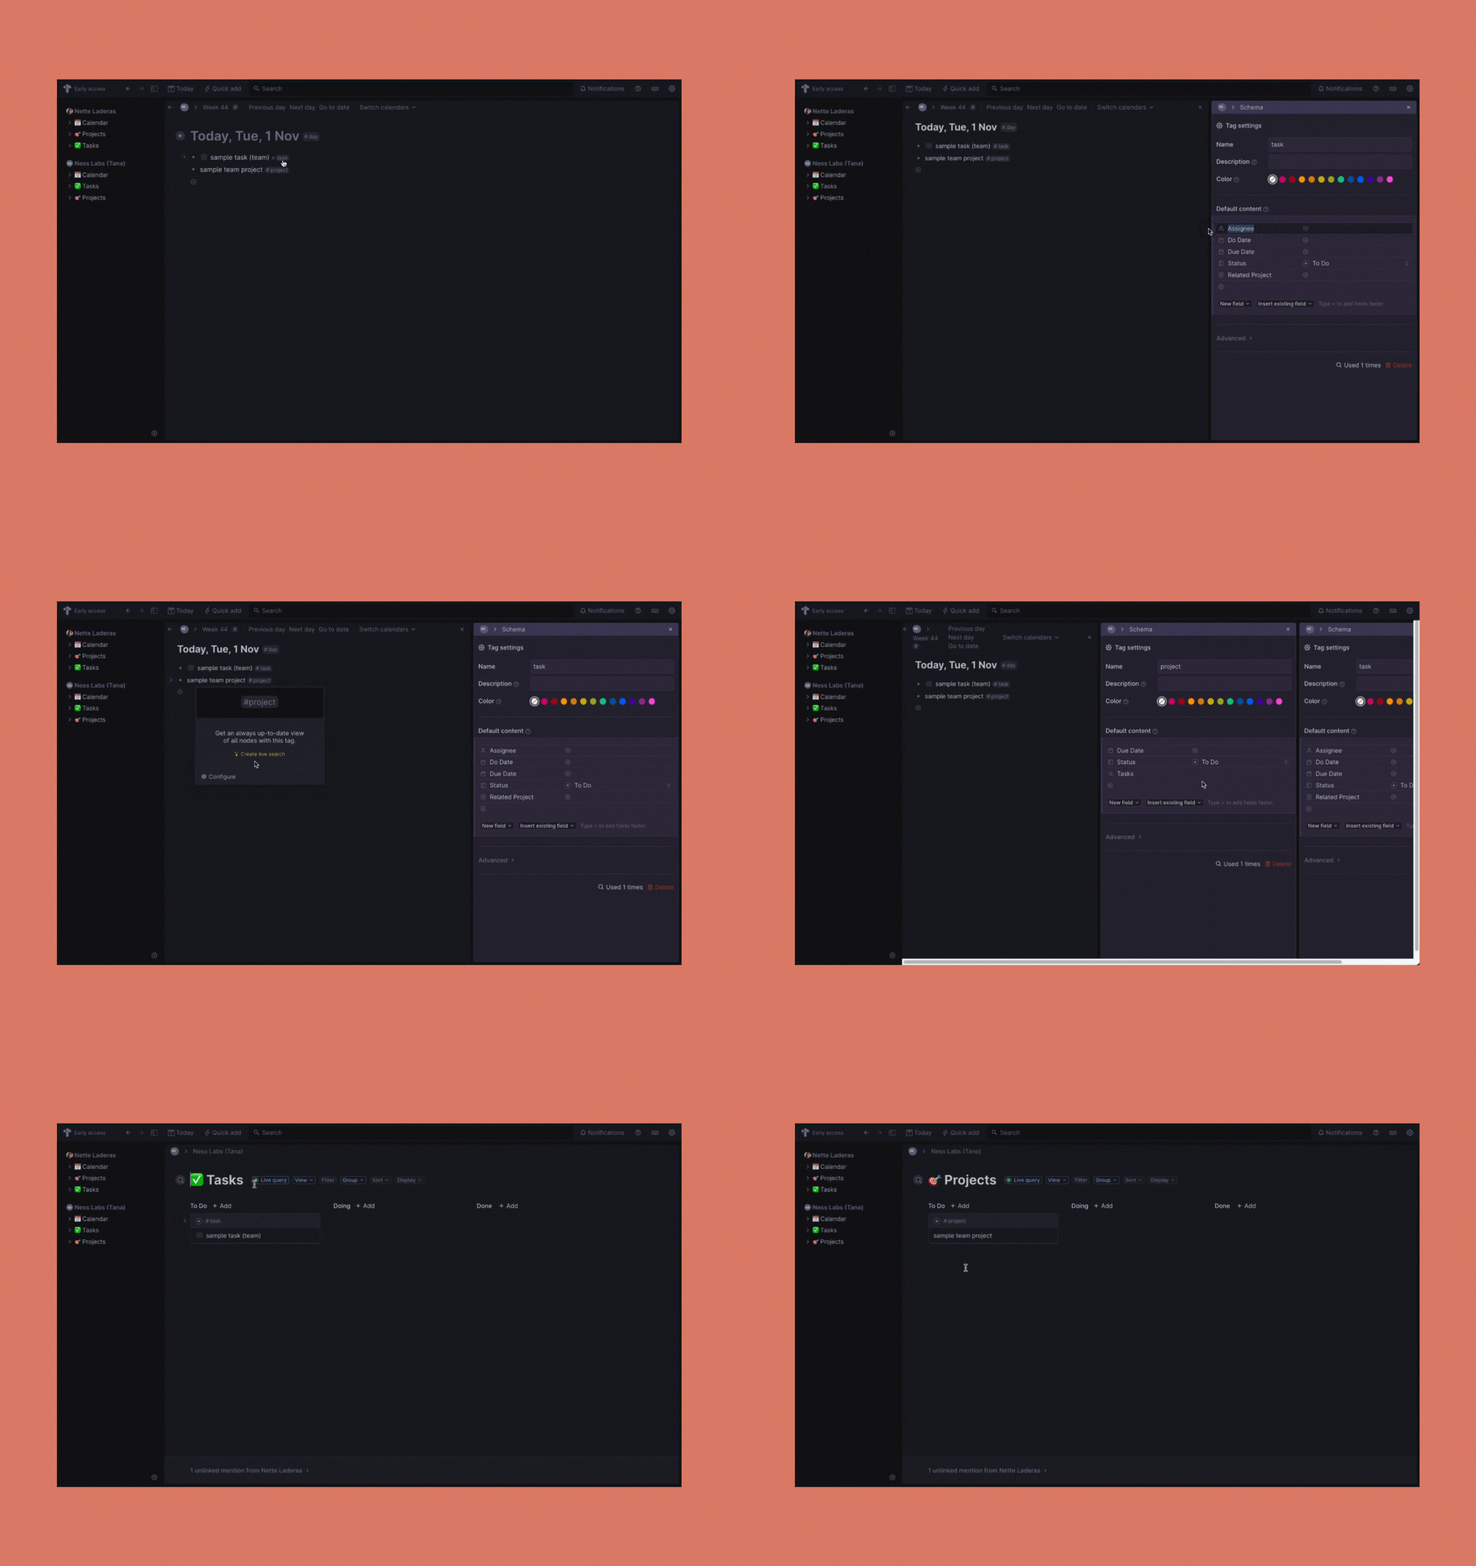
Set up task and project databases. This is comparable to what we discussed earlier about managing your own tasks. Due to the fact that this is for a team and the tasks and projects will come from the team workspace rather than your own workspace, there is an additional “Assignee” user field.
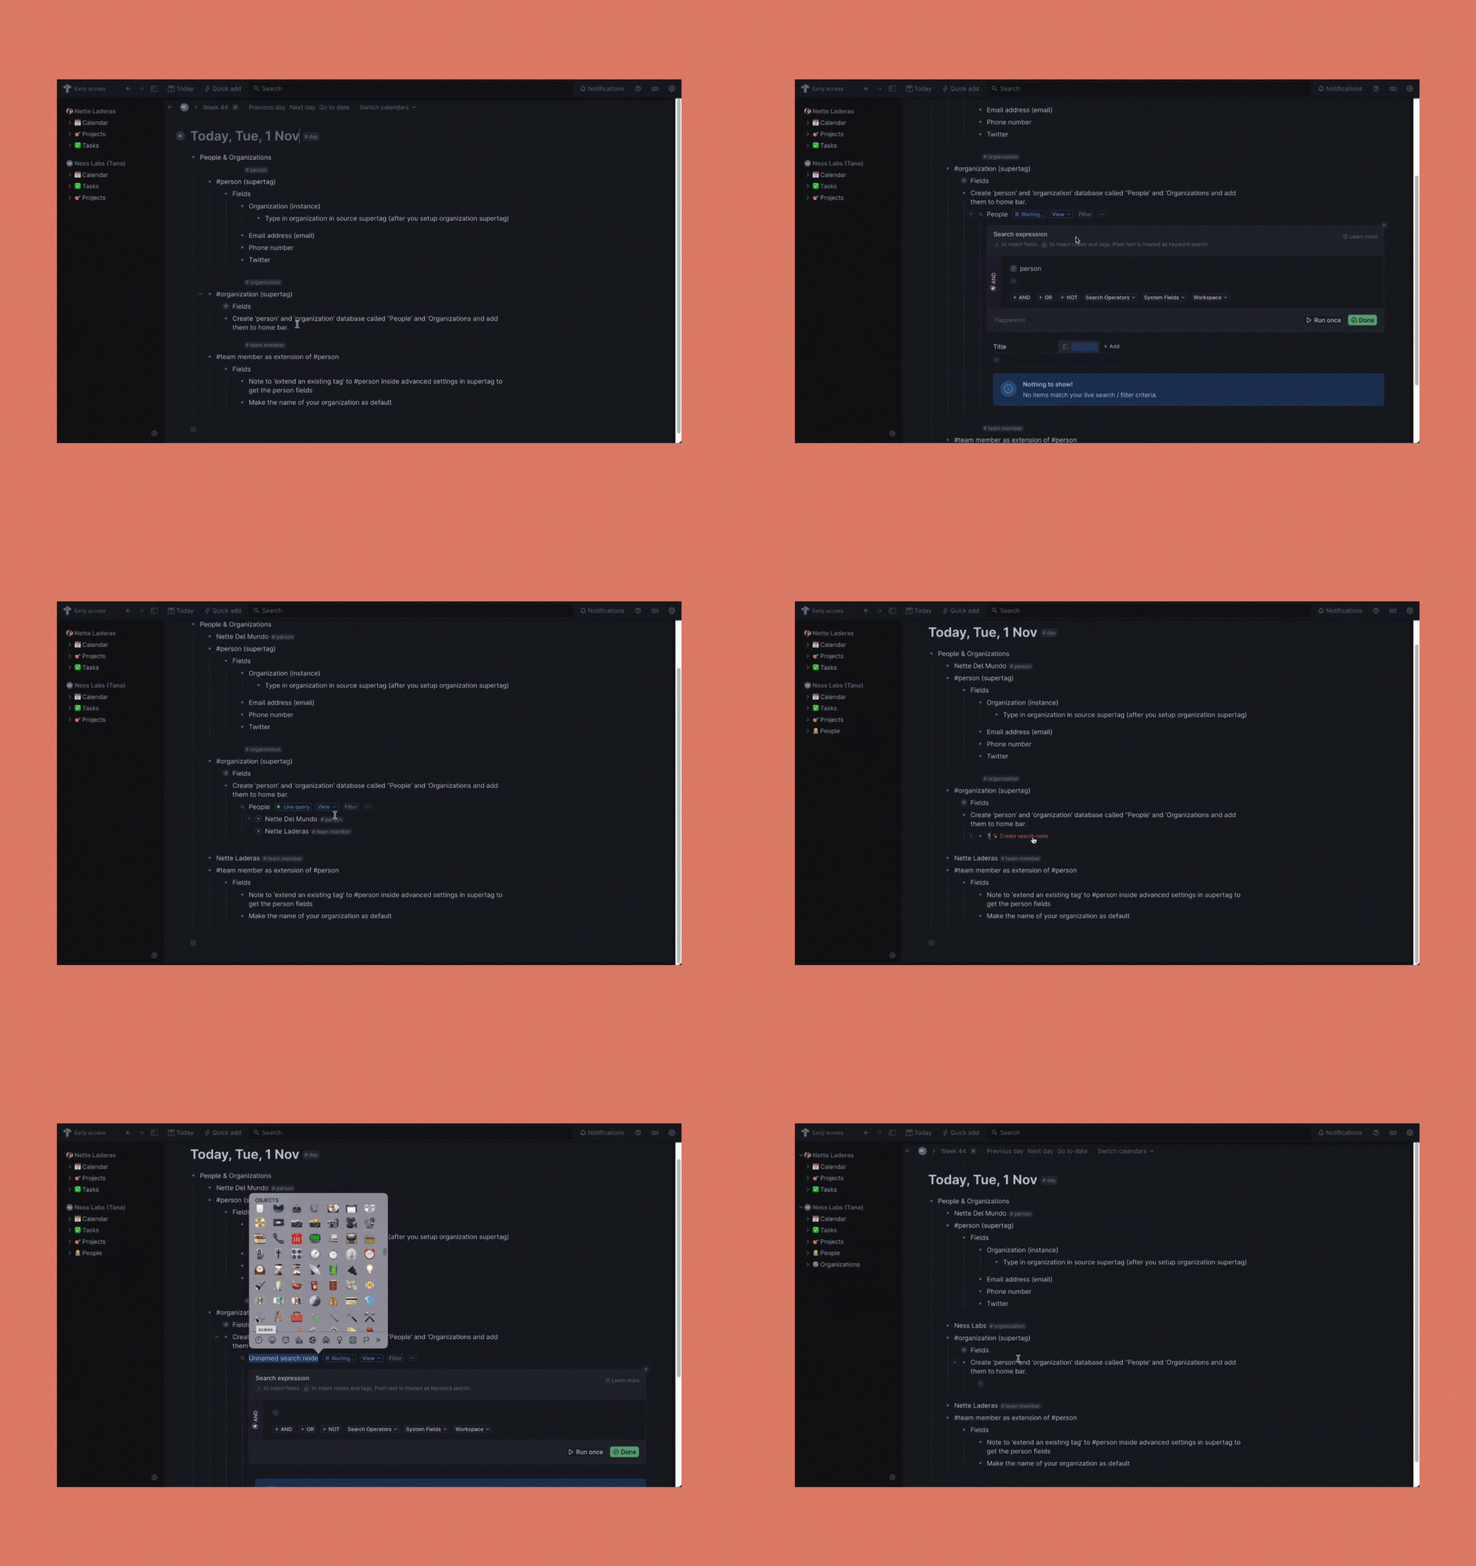
Set up people and organizations. This will serve as your team’s and customers’ database.
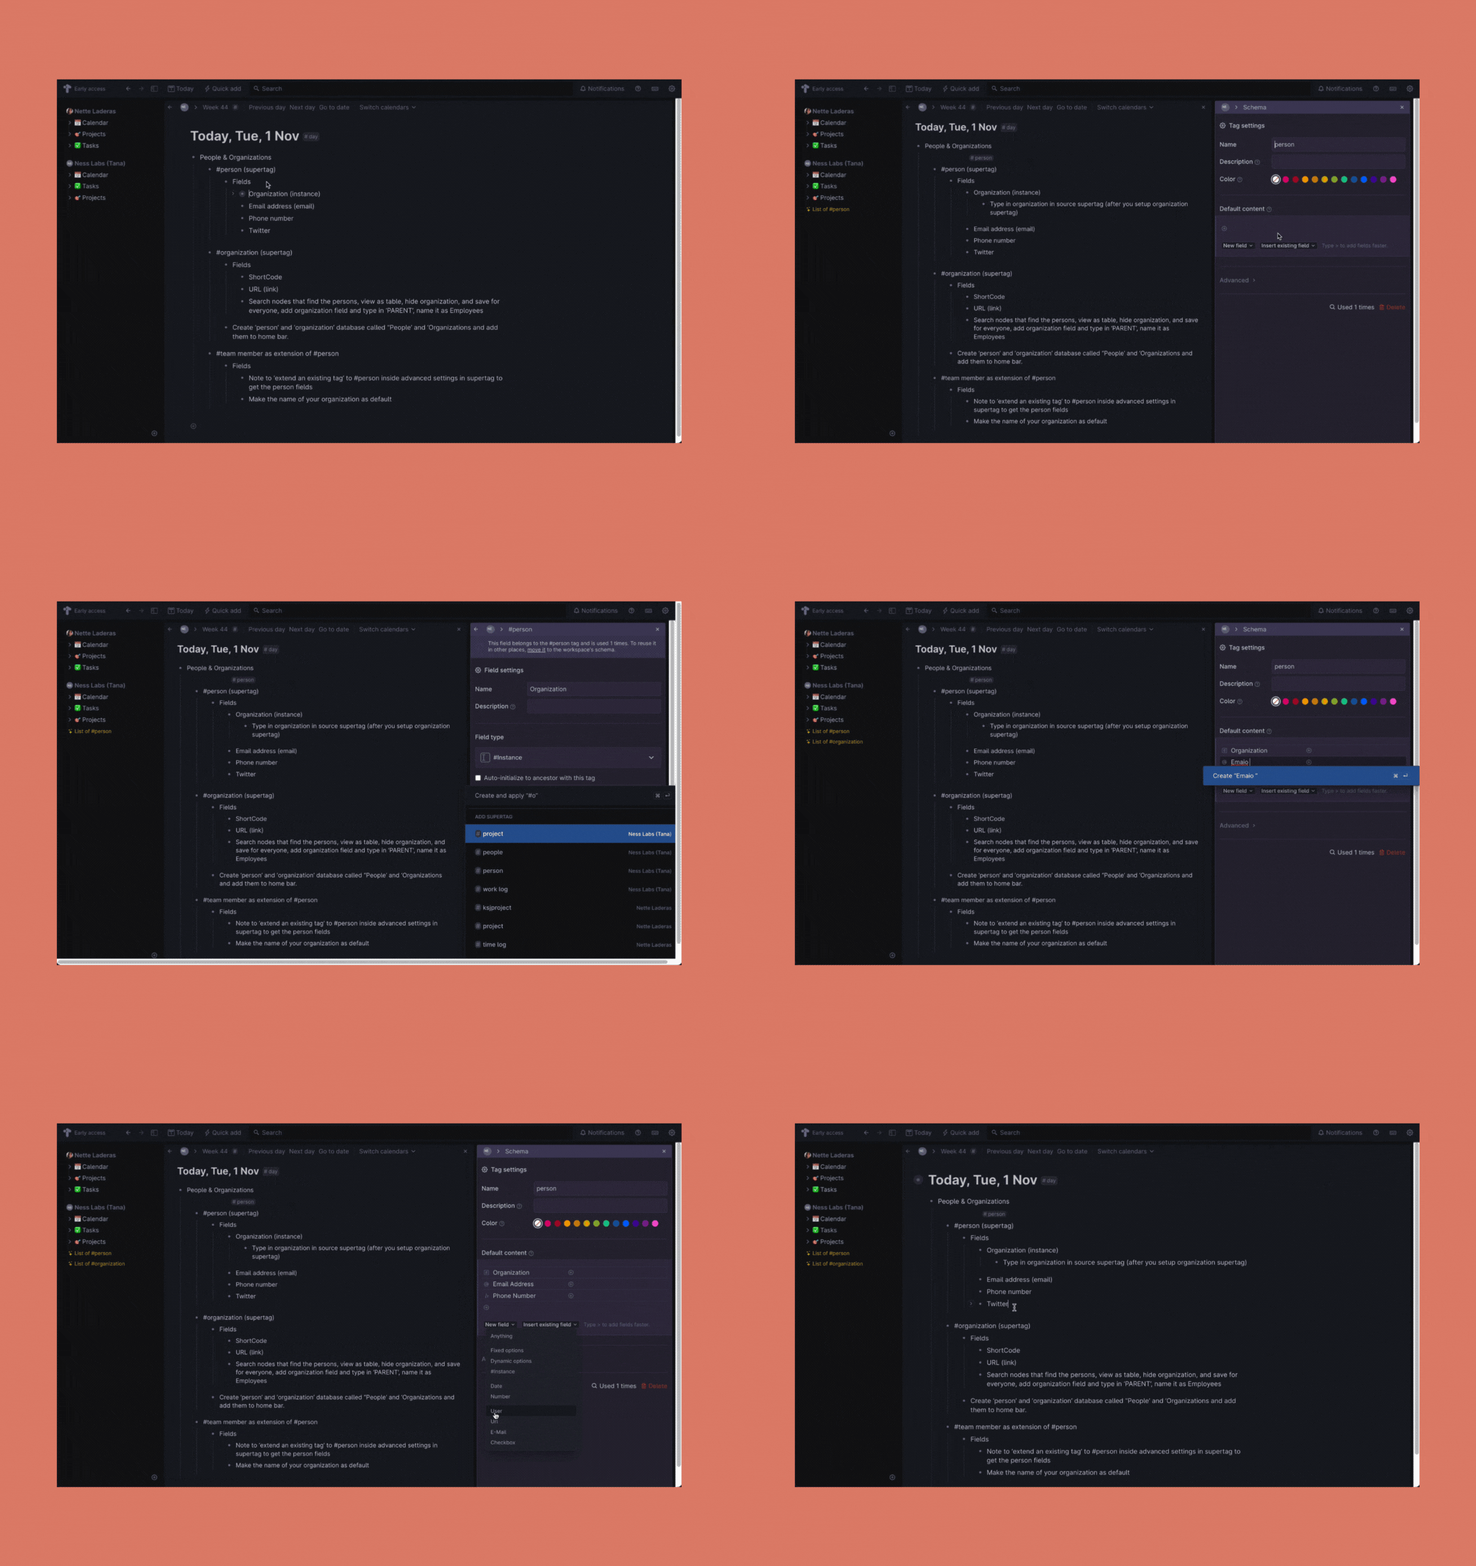
Make a supertag out of a “person” tag by configuring it. Make sure the supertag contains the following fields:
- “Organization” as an instance field setting #organization as the source supertag
- “Email” address as an email field
- “Phone” number as a number field
- “Twitter” or other preferred social networking sites
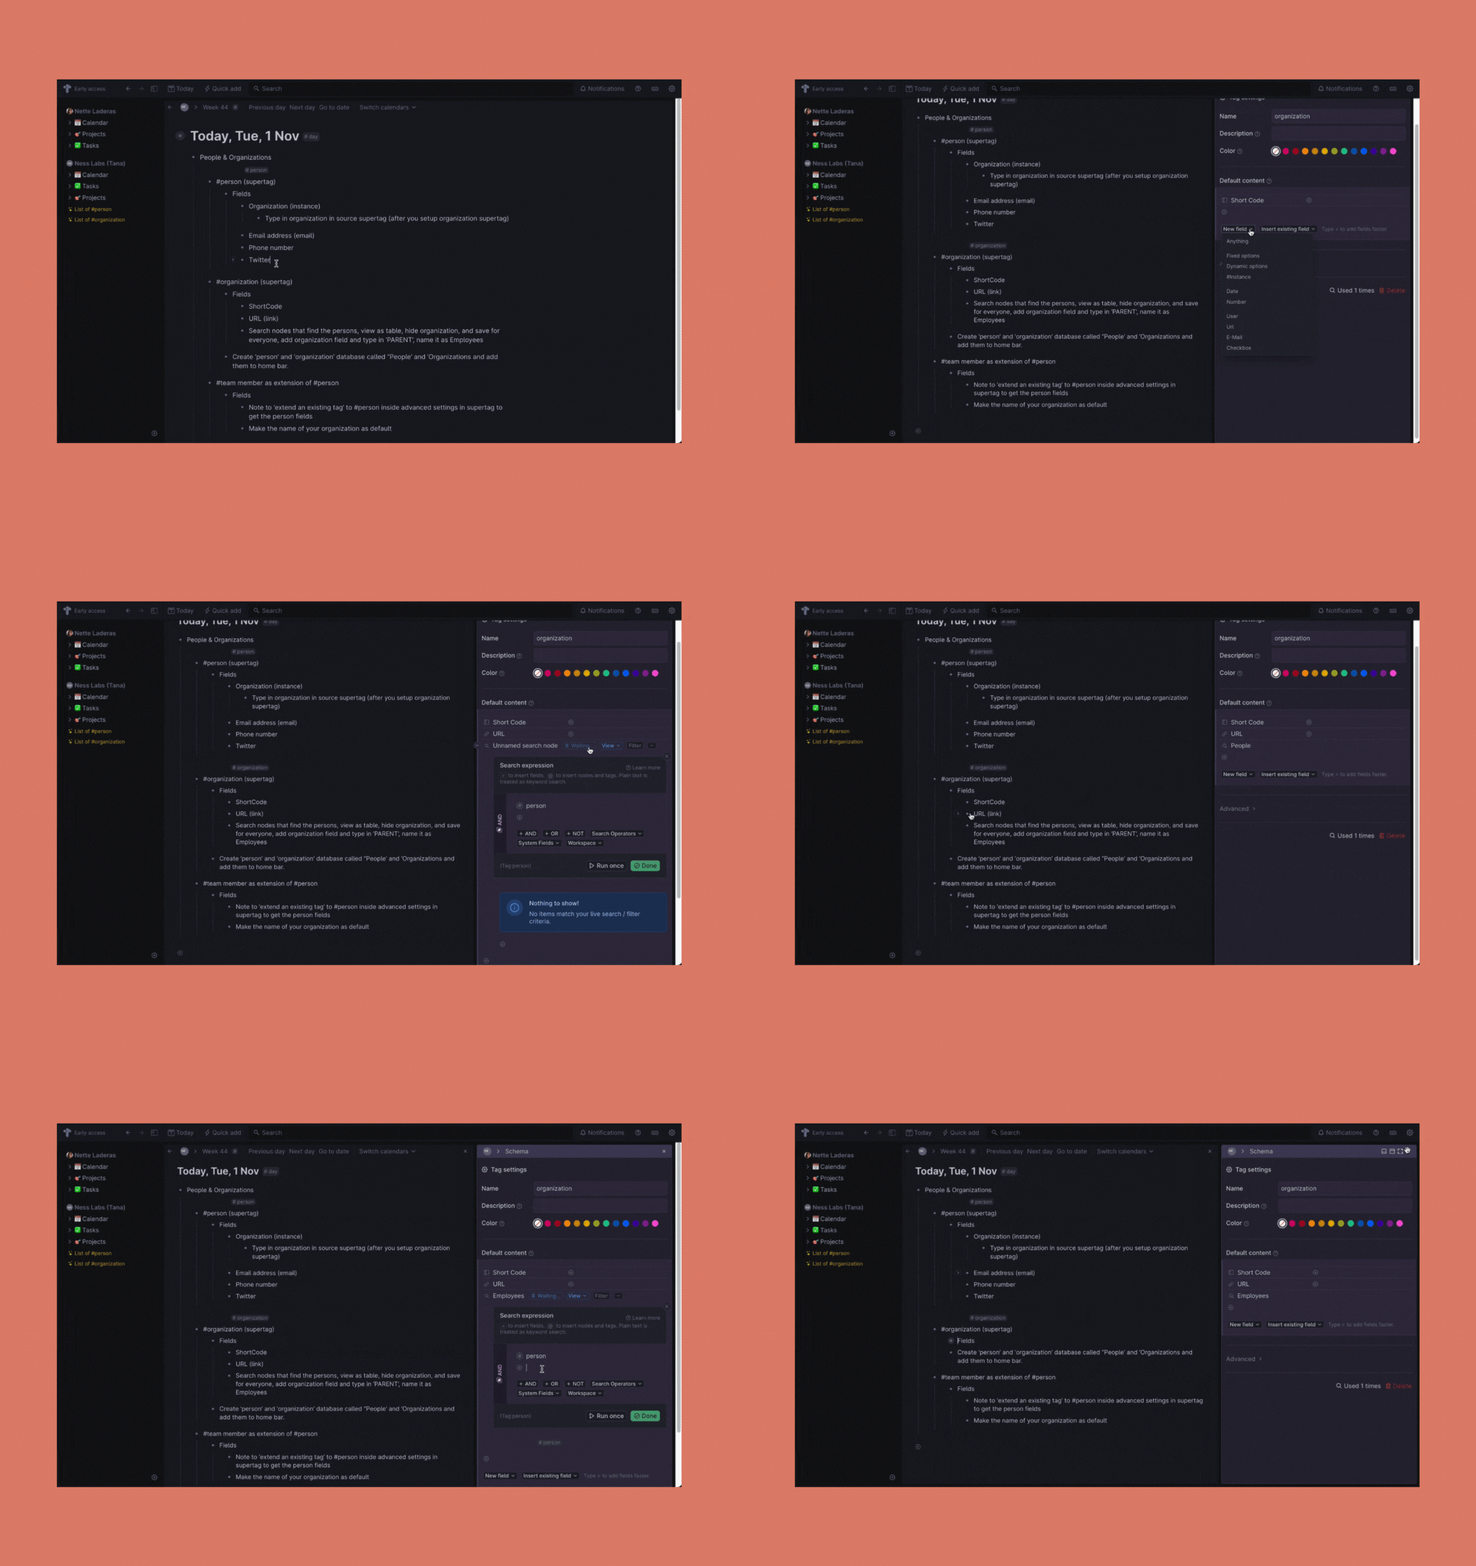
Make a tag called “organization” and configure it to become a supertag. Make sure the supertag contains the following fields:
- Shortcode
- URL as a link field
- “Employees” as a search node (type in #person and make a field called Organization and set the value as PARENT)
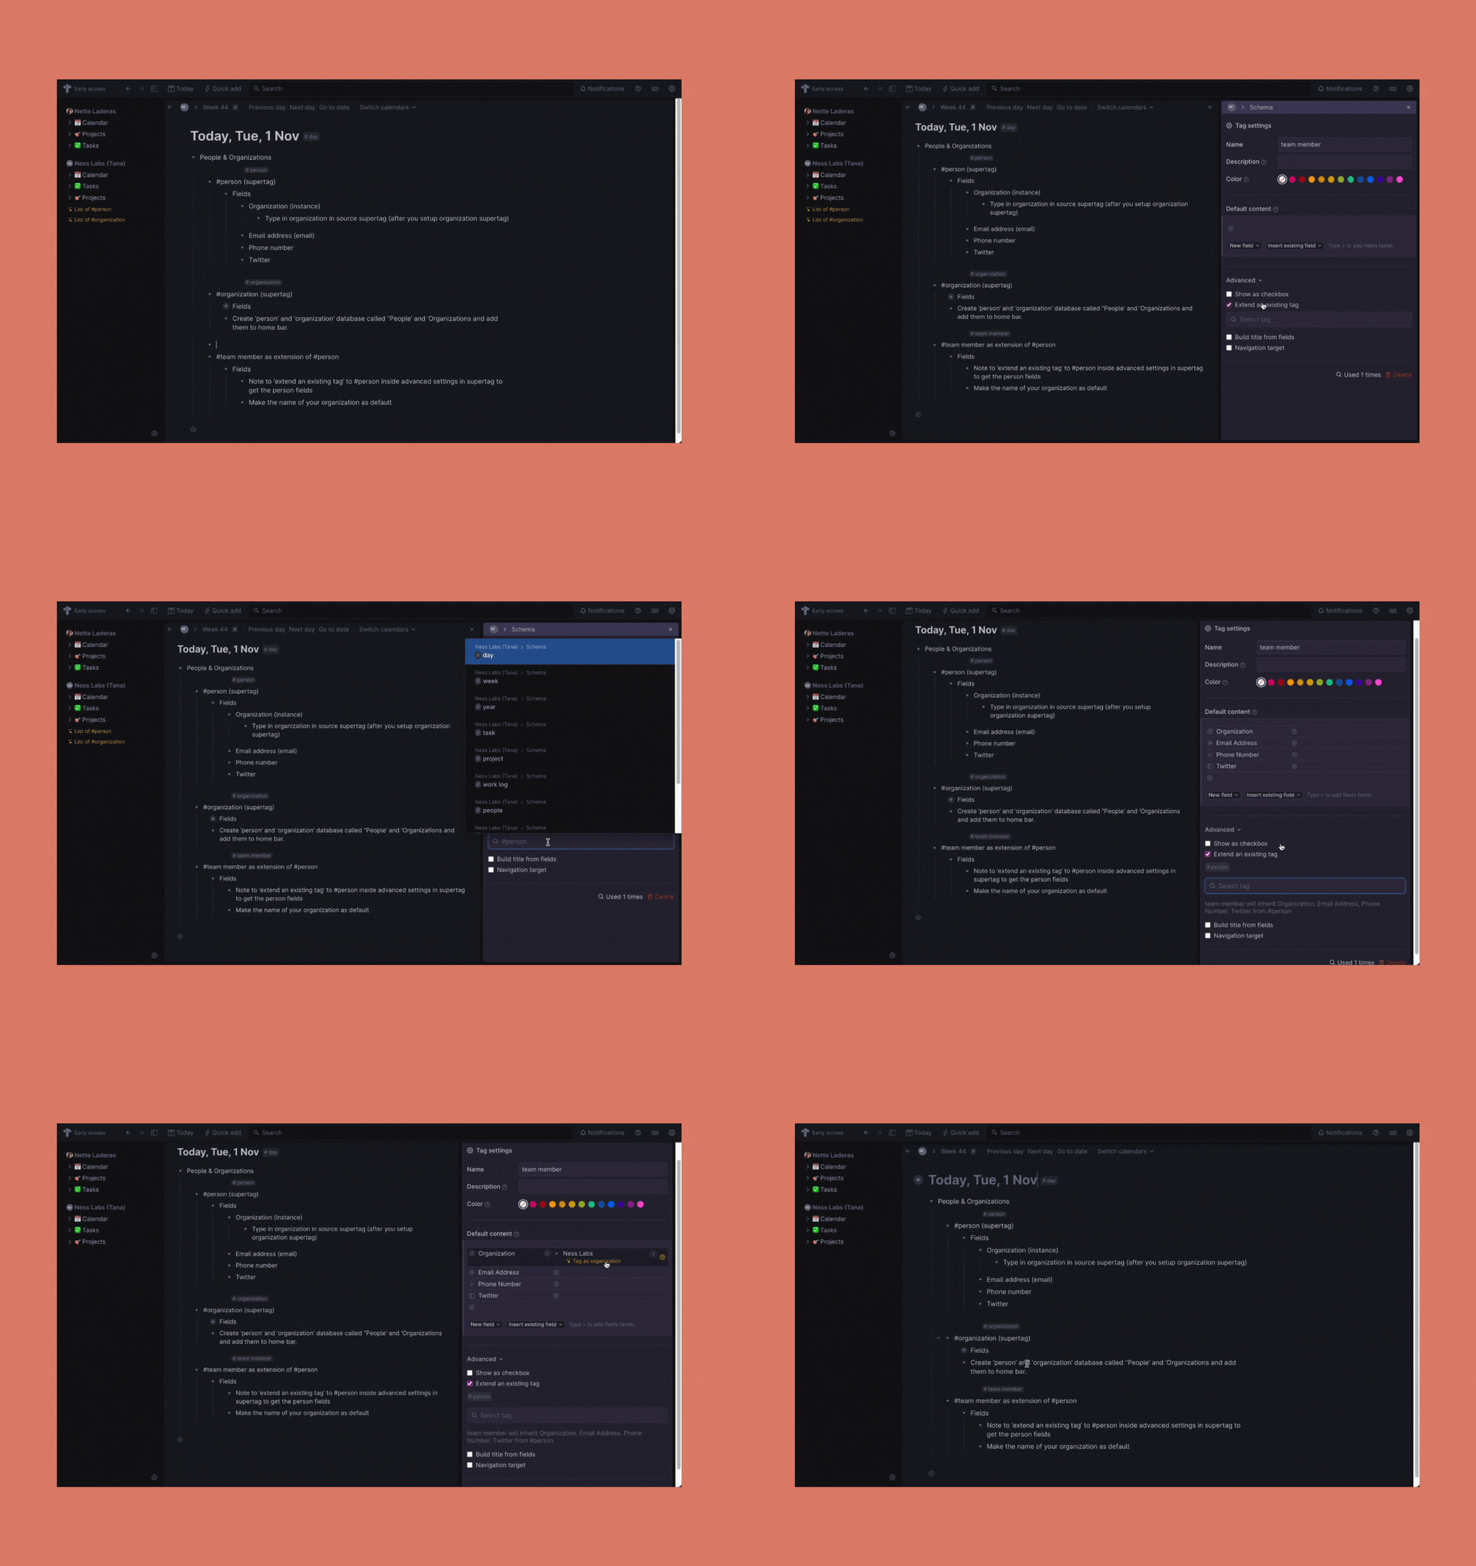
Make a tag called “team member” and configure it to become a supertag. To obtain the person fields, remember to “extend an existing tag” to #person in the supertag’s advanced settings.
Make databases for “people” and “organizations” with the names “People” and “Organizations” and include them in the sidebar.
Set up work logs. This is similar to the time log that was previously explained, with the exception that since this is a collaborative process, the individual who performs the task is identified.
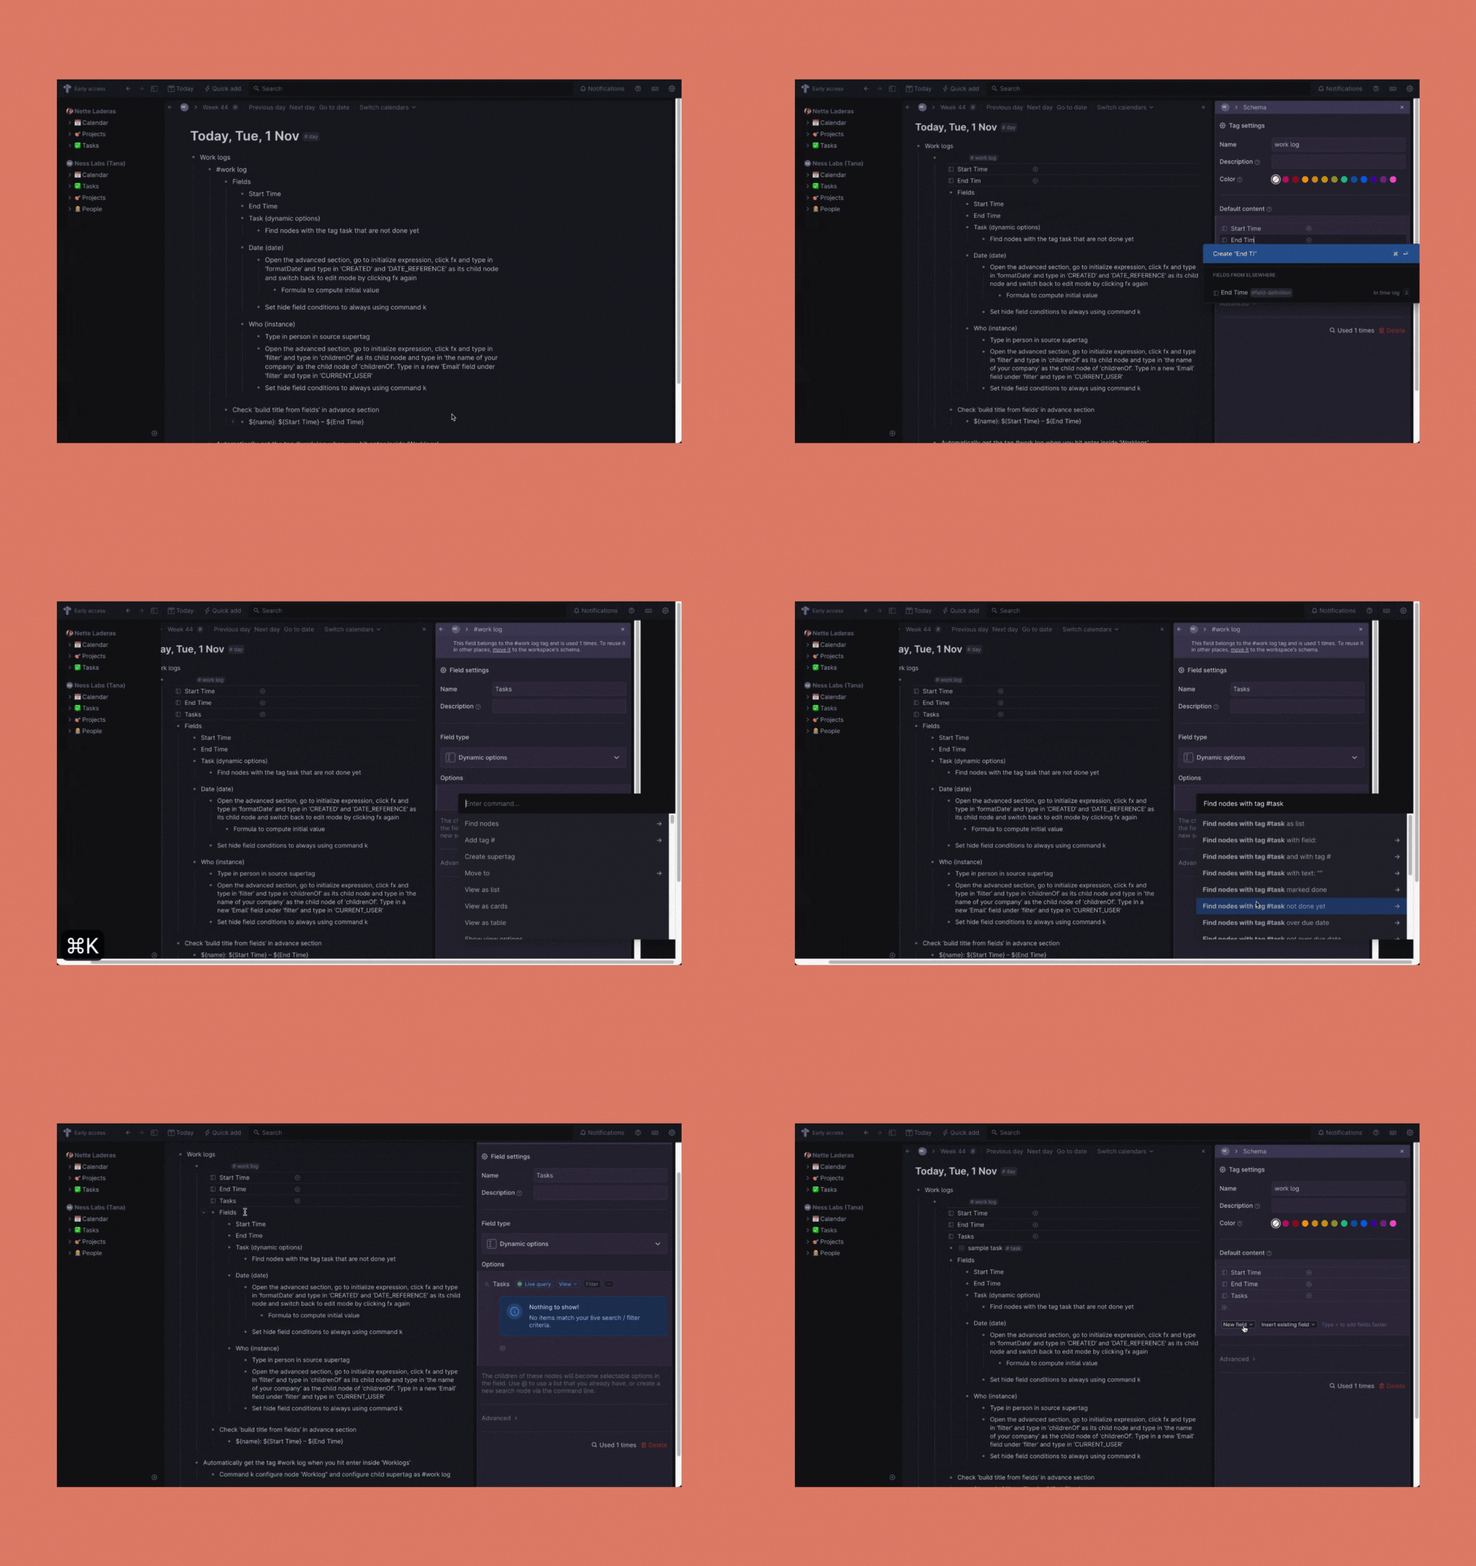
Make a supertag called “work log” and configure it to become one. Make sure the supertag contains the following fields:
- Start Time
- End Time
- “Task” as a dynamic option field that searches nodes with the tag ‘task’ that are not done yet
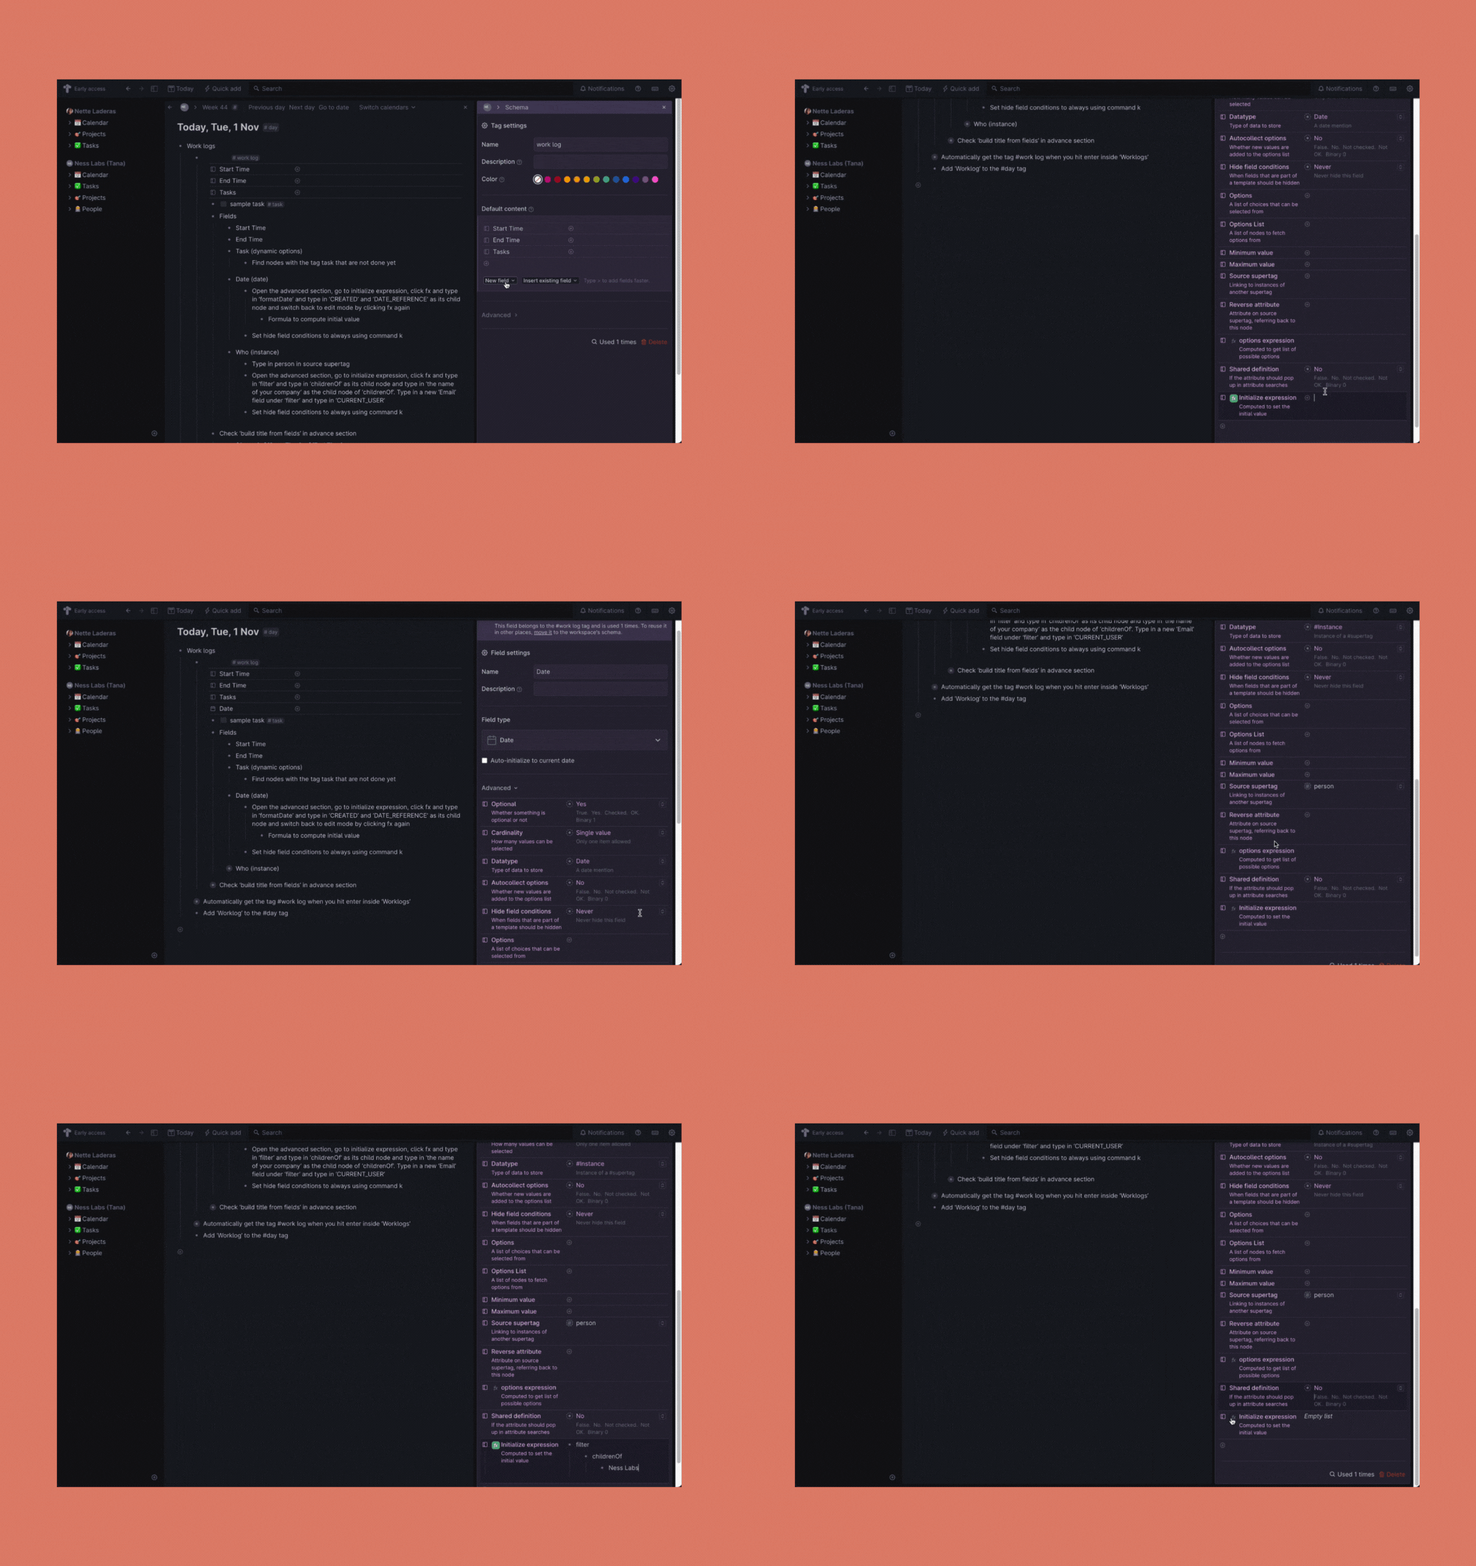
- “Date” as a date field: Open the advanced section, go to initialize expression, click fx and type in ‘formatDate’ and type in ‘CREATED’ and ‘DATE_REFERENCE’ as its child node and switch back to edit mode by clicking fx again. Set hide field conditions to always using command k.
- “Who” as an instance field: Type in #person in the source supertag. Open the advanced section, go to initialize expression, click fx and type in ‘filter’ and type in ‘childrenOf’ as its child node and type in ‘the name of your company’ as the child node of ‘childrenOf’. Type in a new ‘Email’ field under ‘filter’ and type in ‘CURRENT_USER’. Set hide field conditions to always using command k
Check ‘build title from fields’ in the advance section and type in ‘${Tasks}: ${Who} ${Start Time} – ${End Time}’ in the expression field.
By setting the child supertag to #worklog, you may have the tag “work log” appear automatically when you click enter inside the “Work Logs” section of your daily template.
That’s it! Tana makes it simple to set up a simple yet powerful team management system. Not only is the user interface attractive and the layout is simple, but collaboration is made simpler by the ability to view what others have accomplished. Have fun with Tana, and feel free to join the Ness Labs Learning Community to discuss Tana and other tools for thought!
