Are you considering switching from Notion to Roam? Both have their advantages: Notion is an all-in-one workspace with features such as tables and templates, while Roam focuses on helping you connect your ideas and exploring connections between them. As a general rule, Roam is best for gardeners, while Notion is best for architects.
If you feel like you could benefit from having a different way to approach your notes, read this guide to explore key considerations and use the step-by-step tutorial to ensure a safe transition from Notion to Roam.
Why you may want to switch from Notion to Roam
Beware of the shiny toy syndrome — switching tools always requires a bit of work, and it may not always be worth the hassle. If you are wondering whether you should migrate from Notion to Roam, here are some key differences to consider before making the switch.
Serendipity
In Notion, to look up a piece of information, you need to go to a project folder, open the specific page, and unroll the particular header. If you’ve tried using Notion and don’t like the structure it imposes on you, you might want to switch to Roam. It encourages you to explore your knowledge graph, increasing serendipity in your notes as you organically create connections between them to generate new ideas. If you’re more of a gardener than an architect, you might want to switch to Roam.
Creativity
Notion is better for organising information, while Roam is better for creative exploration. Because you don’t need to structure your notes in Roam, some patterns emerge over time organically. By exploring your notes and these patterns, Roam helps you to implement combinational creativity and idea sex.
Frictionless note-taking
Notion’s cabinet-file approach requires you to think about where to put the note before you even create the note. Roam allows you to skip this step and go straight to note-taking. Simply dump the note into the Daily Note and you can organize it later. Instead of deliberating about where the note should fit and how exactly you will use it later, Roam helps you to focus on note-taking by making it as frictionless as possible. It’s also easier to create a new note in Roam, where you can use the search bar or even in line by typing double brackets. In addition, Roam becomes more useful over time as more references are effortlessly created as you write new notes.
Bi-directional linking
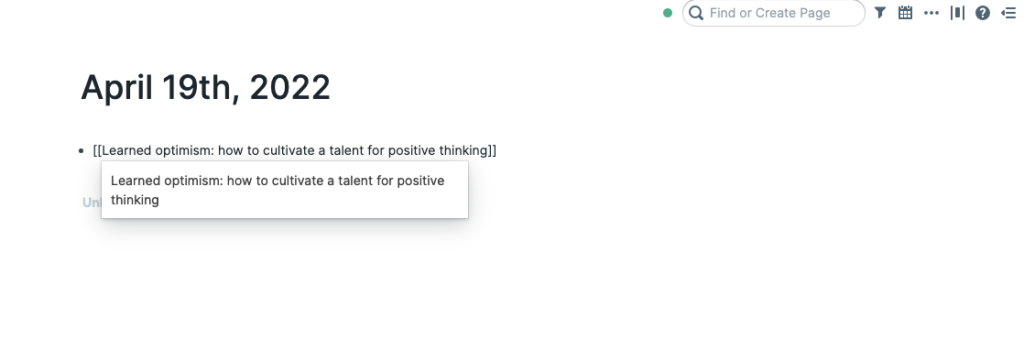
One of the main features that make Roam different from Notion is its approach to bidirectional linking. You can link to an existing page or create a new page by using double brackets or a hashtag.
Here is an example of a page with content:
And here is a page without any content yet, but has other notes linked to it. As you can see, it’s effortless to refer to the other pages linked to it under the linked references.
While the linked references themselves are powerful, Roam can also show pages that mention the term of your current page but haven’t been linked yet. You can then link these pages back to the current page by clicking on Link.
You can also do this at the block level, where each bullet point can be linked to other pages and you can easily look at the pages it links to, similar to the implementation in the page-form mentioned above.
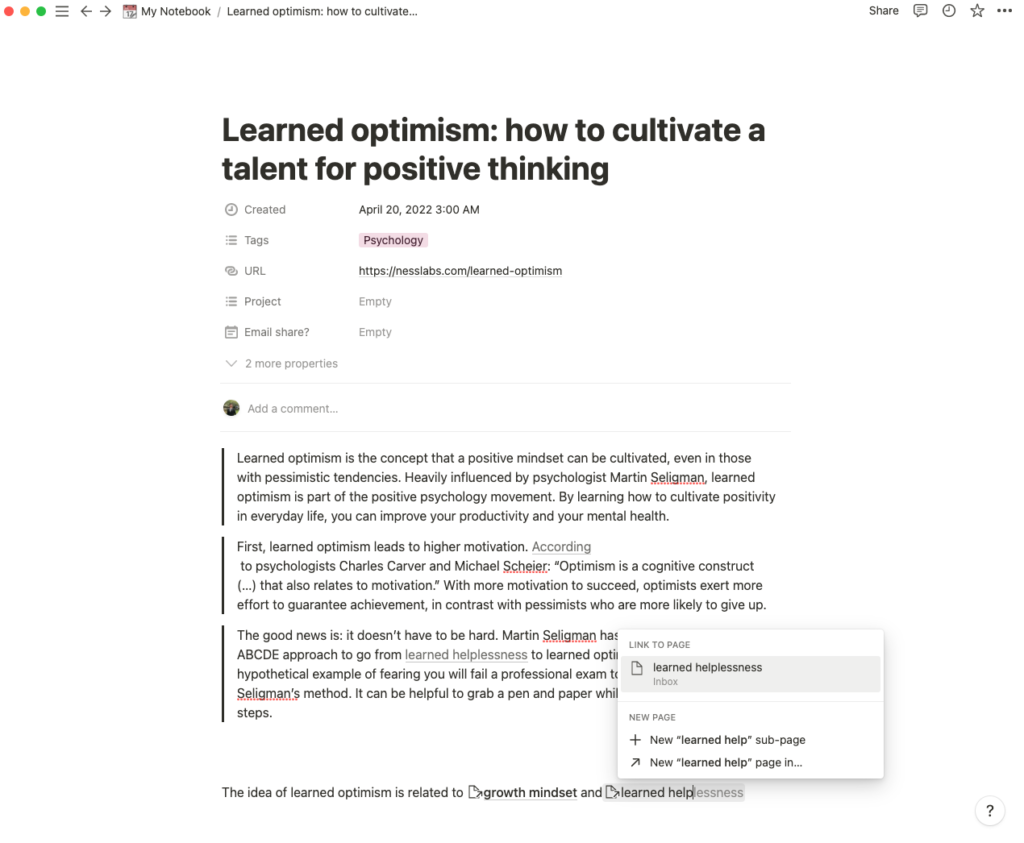
Notion also has bi-directional linking, which they call backlinks. These links are created by using @ mentions targeting specific pages. Here’s an example of how backlinks are created and used in Notion.
While Roam shows your backlinks at the bottom of each page, Notion shows them at the top, below the page title. These backlinks are, however, hidden by default in Notion and must be clicked to reveal them.
Research
Compared to most note-taking apps, Roam’s ability to help you collect and connect information is second to none. This is why Roam is particularly suitable for research work. With the sidebar panel, you can open many pages at once to view and expand on your research across several workstreams. Roam also makes it easy to cross-reference content with bi-directional links and block references.
Journaling
Like note-taking, journaling is also frictionless in Roam. One of the ways to journal in Roam is by documenting your day in the Daily Notes page. Because Roam allows you to create timestamps, it is a suitable app for practising interstitial journaling.
Why you may want to stick with Notion
As we have seen, there are some fundamental differences between Notion and Roam. However, if these features are not relevant to some of your core concerns, you may not necessarily want to switch. You may actually consider sticking to Notion if the following features are essential to your workflow.
Productivity workflows
When it comes to productivity workflows, there are endless possibilities with Notion. With task lists, calendars, Kanban boards, myriads of templates from the community, and multiple database views, Notion excels in creating the perfect workflow for your needs. Databases in Notion can be linked to other documents, filtered for different views, and expanded to provide additional context. While Roam offers features such as tasks lists and Kanban boards, it is more focused on exploratory knowledge management than productivity workflows.
Collaboration
One of Notion’s main features is powerful collaboration. Notion allows you to create a team dashboard or project management list and share it with members of your team. Sharing options are granular as well, where you can give access to documents and revoke access as needed. Roam on the other hand offers limited options for sharing your notes, such as sharing the whole database with an individual, making your database public, or sharing individual pages. The latter option, however, can make the rest of your database vulnerable if a tech-savvy person wants to snoop around.
Integrations
Unlike Notion, Roam does not have a public API. If you rely on integrations with other apps in your workflow, it can be hard to switch to Roam as it requires you to manually copy information into Roam.
How to easily migrate from Notion to Roam in three steps
As we have explored earlier, Notion and Roam are very different to each other. Fortunately, it’s not hard to switch between the two note-taking apps.
1. Export your Notion notes
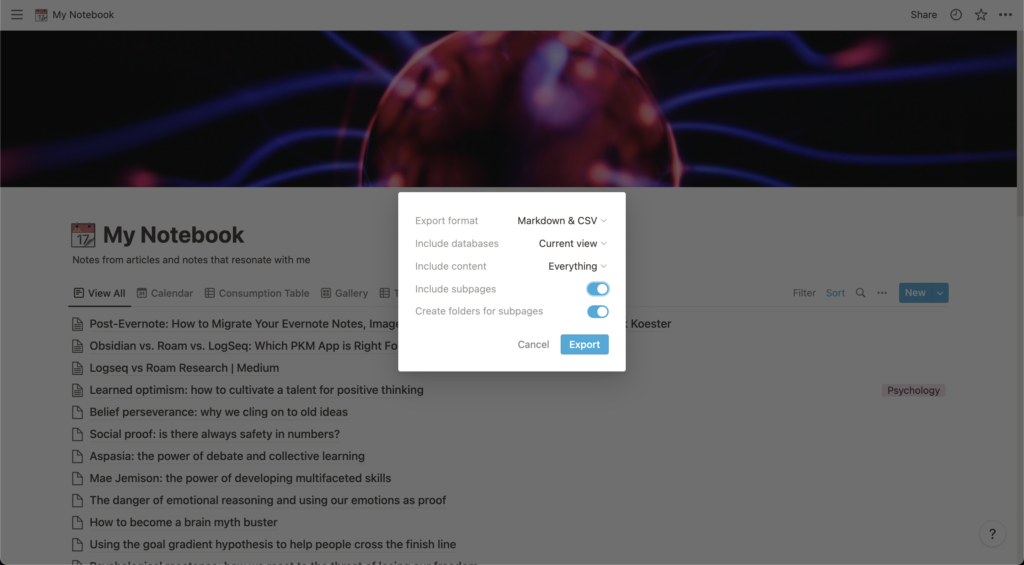
Open the database containing the notes you want to export. Then, click the three dots in the top right corner, set the export format as Markdown & CSV, pick whether you want to include (the current database or everything), switch on “Include Subpages” and click Export.
Notion will export your notes and images as a zip folder, which you can expand to find your notes in Markdown.
2. Import your notes into Roam
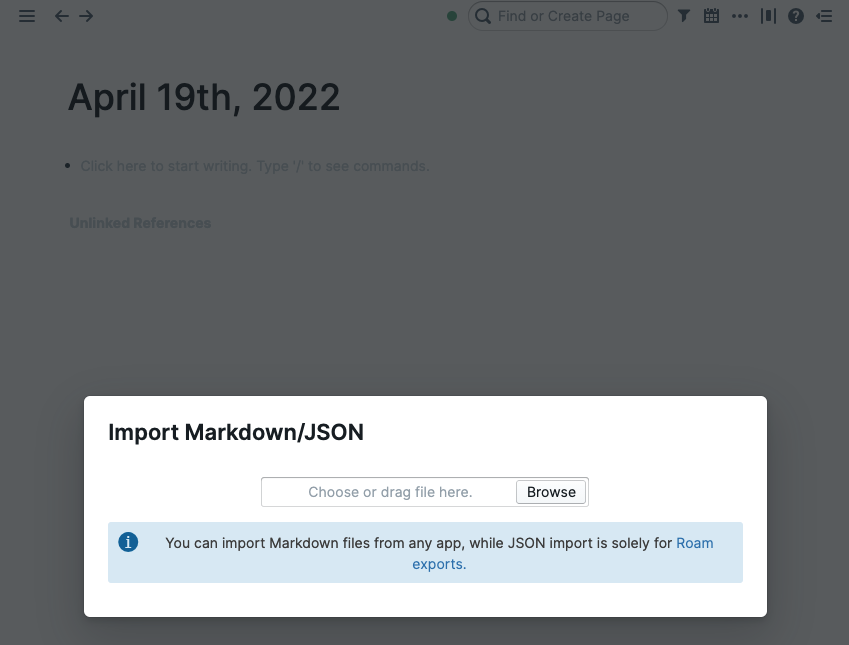
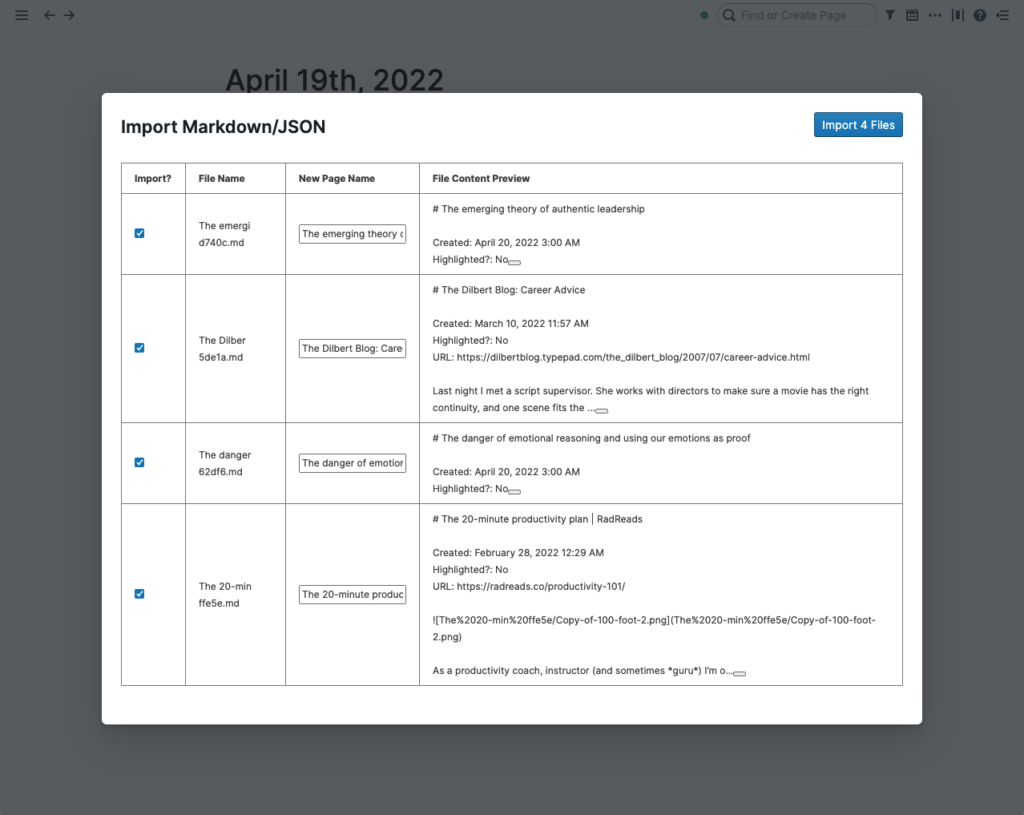
Open your Roam database and click the three dots in the top right corner and click on Import Files. Select the Markdown files you downloaded earlier. This step also gives you the chance to rename some of your notes.
3. Create a page for all your images
Because Notion stores your images in its servers, all your images are exported in a separate folder to your notes. This might lead to missing links in your exported notes. Instead of going through each note and pasting your images, create a page in Roam called “Exported Images”, and put all your images in the document so you can find the missing images.
An alternate method of migration
While the steps mentioned above can be used to migrate your notes, you can also opt to manually migrate each and every one of your notes. This alternative method will allow you to only migrate relevant notes, especially the notes you are currently using for your work. By migrating your notes manually, it allows you to audit your notes and focus on the notes that matter.
To do so, simply:
- Create a new note in Roam, either by using the search bar or creating a new page inline from the Daily Notes or any other page by using double brackets or hashtag function.
- Copy and paste the content from Notion, making sure to include any images as well.
- Add relevant metadata to the note, especially the metadata associated with your note in Notion.
- Add backlinks in your notes for easy reference and organization.
Getting used to Roam
Now that you’ve successfully migrated to Roam, let’s explore some changes that you need to make to your workflow.
Backlinks and block references
Similar to how links work in Notion, you can create links to other notes by using the double bracket, or using the hashtag. However, it is easier to create backlinks in Roam due to how fast the fuzzy search is. Unlike in Notion, you can also create links to individual blocks by typing (()).
Productivity features
While Roam’s productivity features are not as extensive as Notion’s, you can use features such as Kanban boards, task lists, as well as Pomodoro timers in Roam. Similar to how Notion does it, you can use these features by typing a forward slash in line, typing in the feature you want, or using keyboard shortcuts such as cmd + Enter to create a to-do list
Unlinked references
One of the most powerful features in Roam which Notion lacks is the ability to link your notes with the unlinked references function. This allows you to serendipitously generate connections between your notes as you roam and explore your database. Make sure to incorporate this into your workflows to make the most of Roam!
In summary, if you prefer structure and organization in your tool for thought, stick to Notion. If you prefer less structured notes that prioritise brainstorming and discovery, more akin to a digital garden, you might want to consider switching to Roam. As always, it is not about the tool you use, but how you use it to shape your thinking. If you would like to learn more about using Roam, join the Roam support group in our community.
P.S. Want to learn how to make the most of Roam? Join Roam Essentials, a short course to master 20% of the features that will unlock 80% of Roam’s power.
