As a big fan of thinking in maps, I’m always curious about tools to lay out and connect ideas visually. Many people are not aware as this is a bit of a hidden functionality, but you can actually create diagrams in Roam.
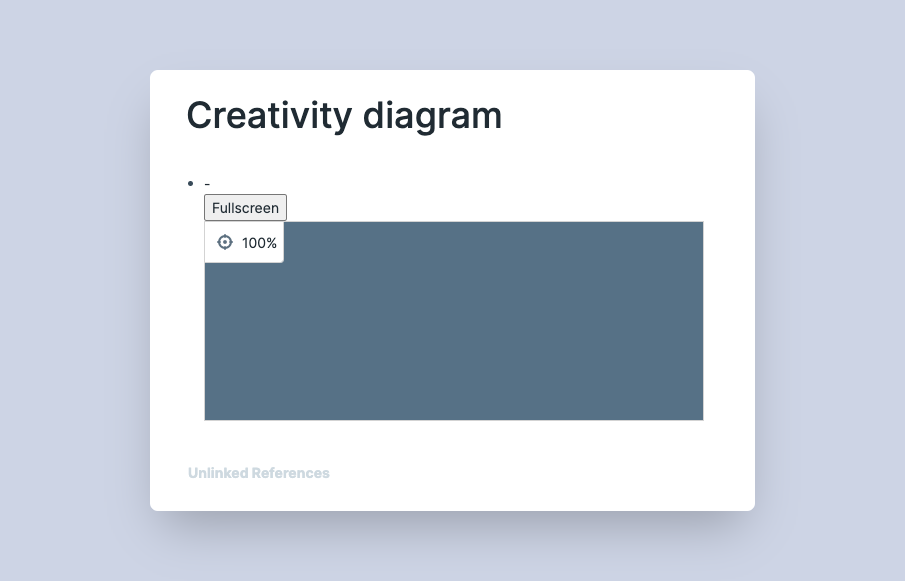
1. Create the canvas. Type {{diagram}} and press enter. You can also type /diagram to use the interactive menu instead. This command will generate a canvas for your diagram. Click on “full screen” so you’re more comfortable.
2. Add new nodes. Double-click anywhere on the canvas to create new nodes.
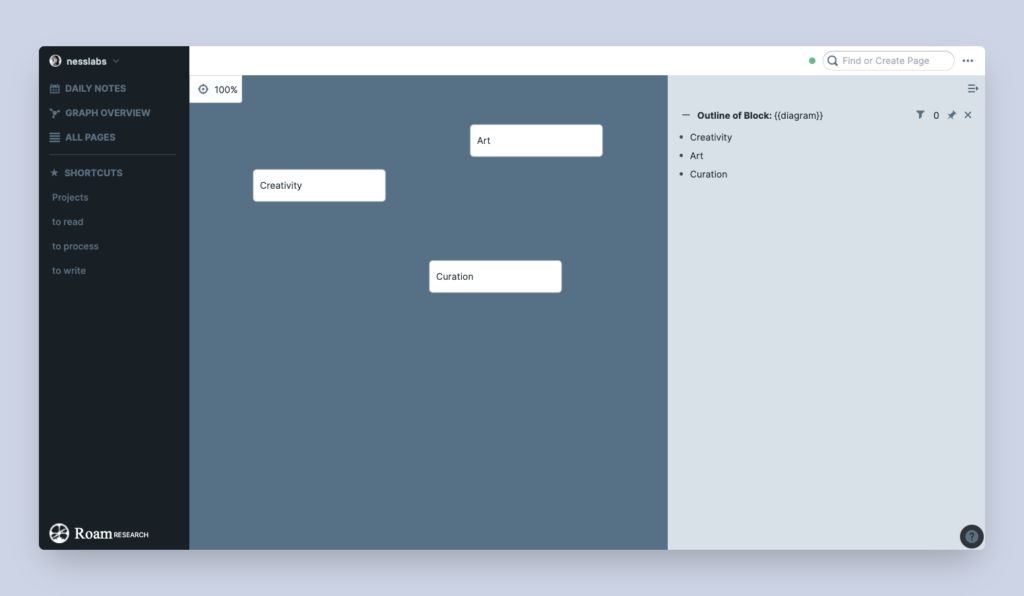
As you can see in the right-side panel, each node is actually a block nested under the parent “diagram” block. Which means you can add any kind of content inside a node that you would usually add to a regular block. Please note that children blocks are not displayed, only the first level of blocks are turned into nodes, but you can still use children blocks in the outline to add more information.
When you insert an image, you may want to use the small square in the bottom right of the node to resize it and make sure it fits.
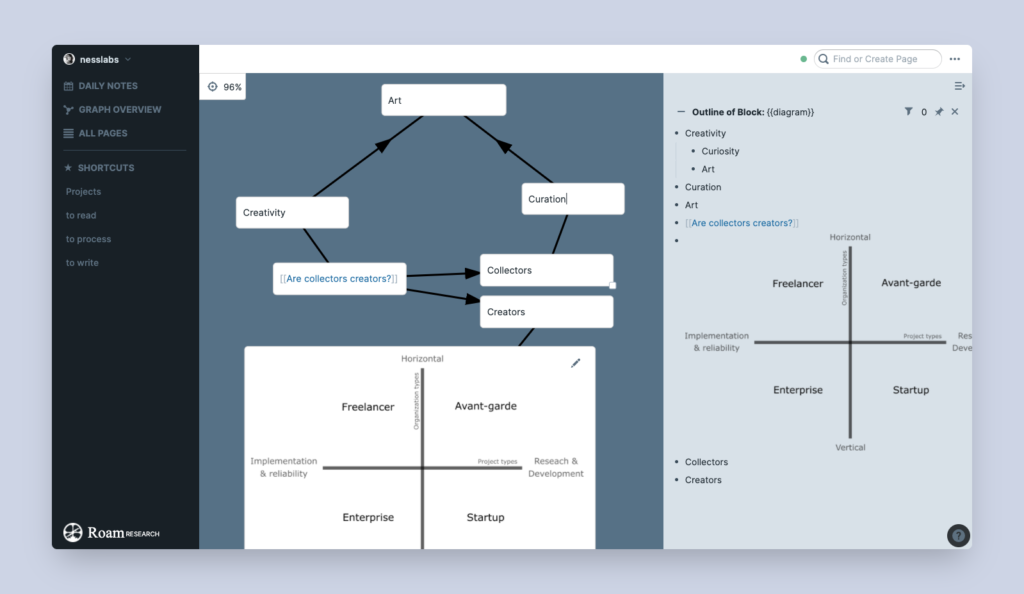
3. Create connections. Hold down the option key while you drag your mouse between two nodes in order to create a connection between the two. Wait until both blocks are highlighted in green before letting go with the mouse. Note that the direction you create the link matters as it will determine the way the arrow is pointing.
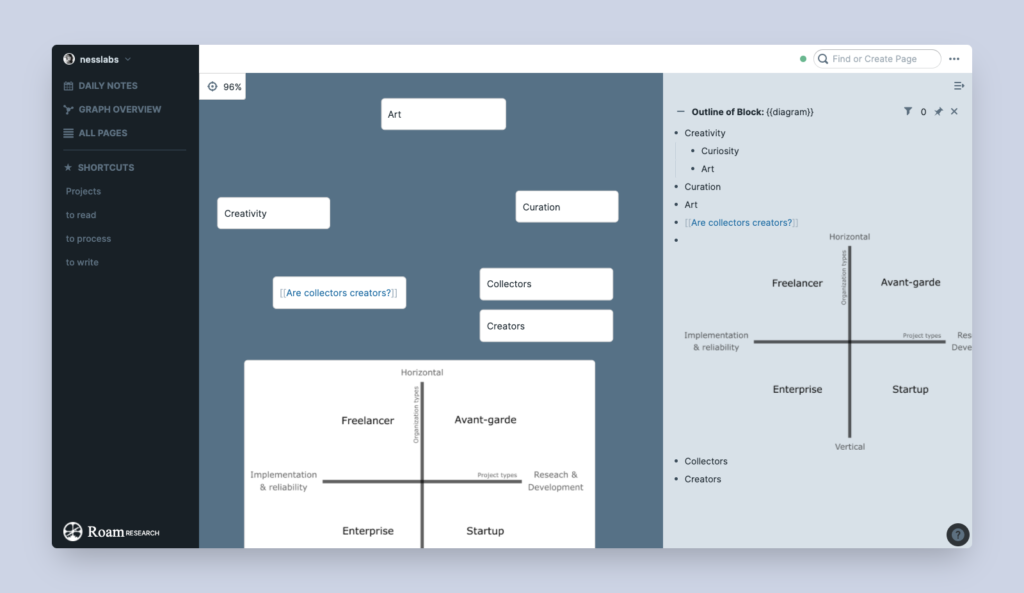
4. Group nodes together. To select multiple nodes, just hold the shift key and click on them. You can also group several nodes together by pressing the option key and drawing a rectangle over them. This is a more permanent kind of grouping that will let you move them all in one go.
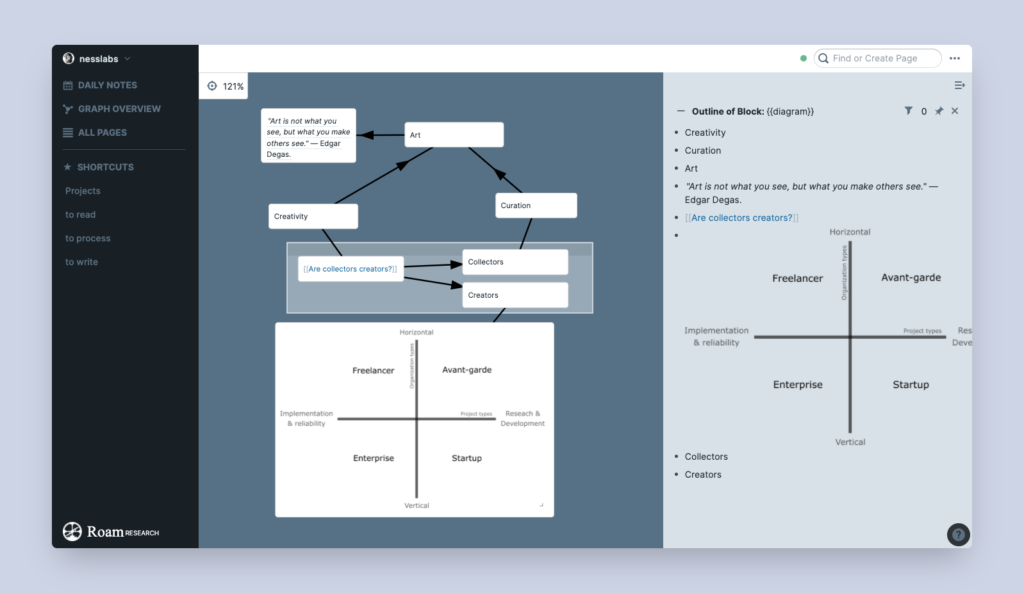
5. Navigate the canvas. The usual mouse controls will let you zoom in and out on the canvas. Whenever you’re too zoomed in or two zoomed out, use the target icon in the top right corner of the canvas to recenter your diagram.
That’s it! It’s still experimental and may lack the functionalities you would expect from a fully-fledged diagram tool, but if you need to quickly map some ideas, it can do a great job without having to switch from Roam to another application.
And if you need a proper video walkthrough, Conor posted a demo video on YouTube:
P.S. Want to learn how to make the most of Roam? Join Roam Essentials, a short course to master 20% of the features that will unlock 80% of Roam’s power.