Imagine having a thinking partner that’s not just smart but also deeply attuned to your specific needs. This is the promise of building a custom GPT model: an AI companion tailored to you, which can help you ideate, learn, and grow.
The power of a custom GPT lies in its personalization. Instead of the one-size-fits all model you use through the default ChatGPT interface, you can train a model based on your unique personal, professional, and cultural context.
As you interact with it, you can continuously provide your thinking partner with feedback regarding your preferred communication style, latest interests, and even frameworks you’d like it to use. This means the insights it offers become increasingly relevant over time.
Whether it’s a tricky problem at work or a personal dilemma, your thinking partner won’t offer generic advice. It will provide potential solutions that consider your specific situation and aspirations.
Here are some of the ways you can use a custom GPT as a thinking partner:
- Analyze your journal entries to identify emotional patterns and spot recurring behaviors
- Identify blind spots and cognitive biases that might cloud your judgment
- Assist you in making more informed and rational decisions
- Guide you through priority-setting exercises to sort through your task list
- Provide metacognitive prompts to encourage you to think about your thinking
- Prepare you for difficult conversations and defuse conflict
- Brainstorm for a new project with fresh perspectives and creative ideas
- Help you understand and manage your feelings more effectively
By fostering deeper insights, a GPT thinking partner can support your personal growth, keeping step with you in every twist and turn. And the good news is that it’s very easy to build. Just follow this simple step-by-step tutorial, which includes pre-written prompts you can copy and paste.
1. Setting up your custom GPT
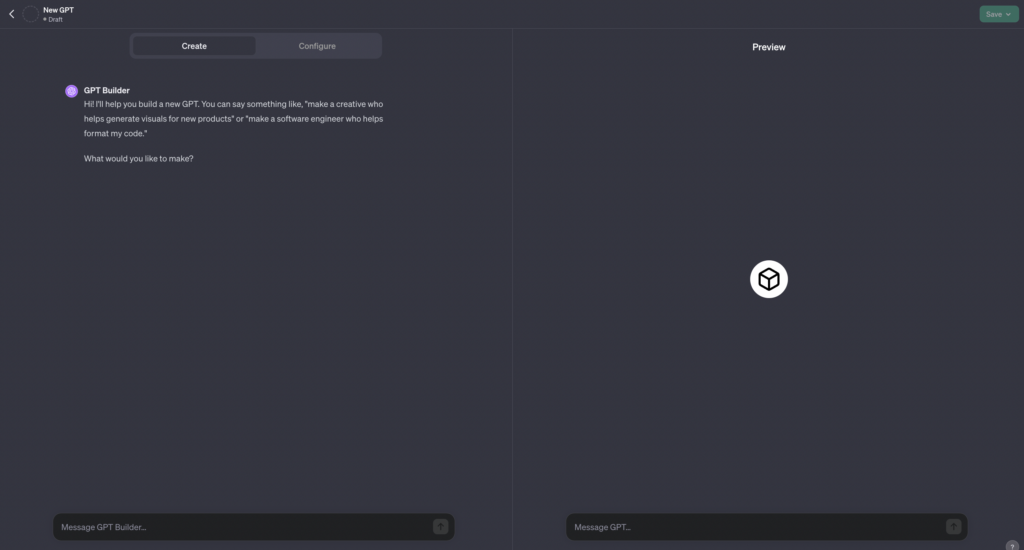
First, go to this link and make sure you are in the “Create” tab. You will see two panels: one on the left side where you’ll be building your GPT, and a preview panel on the right side where you’ll be testing its functionality.
Next, let’s provide your GPT with instructions as to how it should behave. We’re going to start with a short description. Copy-paste this into the messaging box and hit enter:
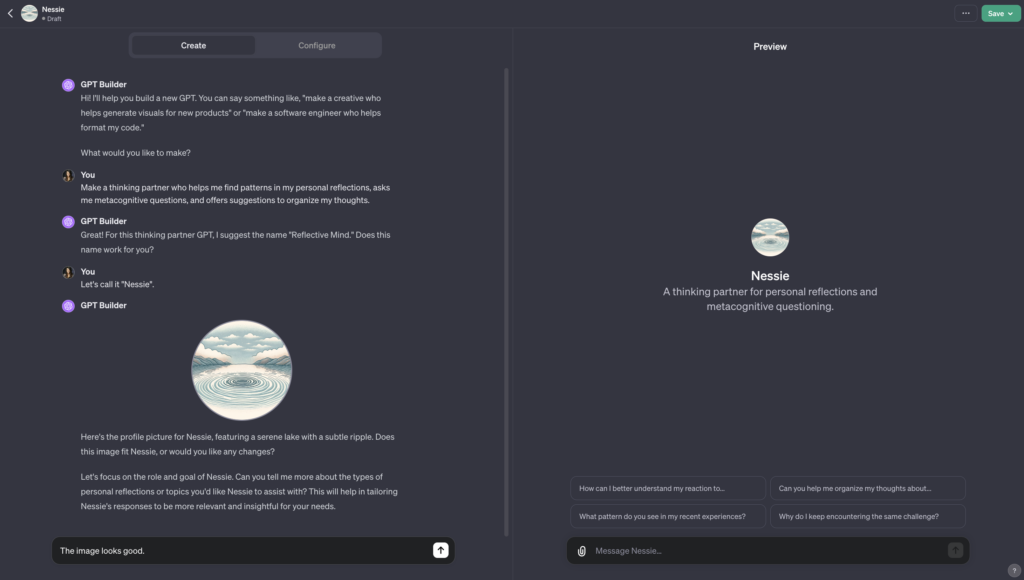
“Make a thinking partner who helps me find patterns in my personal reflections, asks me metacognitive questions, and offers suggestions to organize my thoughts.”
GPT Builder will then suggest a name and a profile picture for your custom GPT. Feel free to accept these default settings by typing “looks good” or customize it to your taste. I decided to call my thinking partner Nessie, and I liked the default image suggested by GPT Builder so I kept it as is.
In the next step, you will provide your GPT with more details to tailor its responses to your needs.
2. Configuring your custom GPT
This is the fun part! You will now train your GPT to become the perfect thinking partner. You can do this through trial and error, but the template below will save you lots of time:
INPUT:
What specific goals do you want to achieve with this thinking partner?
Type here…
Are there particular areas of personal reflection or topics you want this thinking partner to focus on?
Type here…
Could you give examples of metacognitive questions you find valuable?
Type here…
Are there specific frameworks you would like your thinking partner to use?
Type here…
OUTPUT:
How do you envision receiving feedback from your thinking partner?
Type here…
How do you envision the interaction style with your thinking partner?
Type here…
Would you like your thinking partner to adapt its approach based on your responses or maintain a consistent method?
Type here…
SPECIAL CONSIDERATIONS:
How should the GPT handle emotional responses?
Type here…
Are there any ethical considerations the GPT should be aware of?
Type here…
Do you have preferences regarding the use of external data or sources for suggestions?
Type here…
Paste your answers in the messaging box, and hit enter. The GPT Builder will save your instructions.
If you’re in a rush or just want to quickly go through this tutorial, you can copy some sample training data from here. For instance, I like to use this list of metacognitive questions I have crafted over the years, so I have included it in the training of my thinking partner:
- Am I underthinking or overthinking this decision?
- How are cognitive biases influencing my decision?
- How could this decision better align with my aspirations?
- Can I think of an easier version of this decision?
- Can I think of a more adventurous version of this decision?
You could also use questions from thinkers and creators you admire. Tim Ferris uses this list of questions:
- Were my goals my own, or simply what I thought I should want?
- How much of life had I missed from underplanning or overplanning?
- How could I be kinder to myself?
- How could I better say no to the noise to better say yes to the adventures I craved?
- How could I best reassess my life, my priorities, my view of the world, my place in the world, and my trajectory in the world?
And here are some of the questions Tiago Forte uses:
- How is this thing that seems bad actually good?
- What am I pretending? What am I resisting?
- What is the precise feeling in my body I’m interpreting?
Those kinds of questions will help your custom GPT become a better thinking partner by providing some starting points to explore your thoughts.
To see how your training data have been interpreted, click on the “Configure” tab, where you’ll see the name, description, and instructions for your thinking partner.
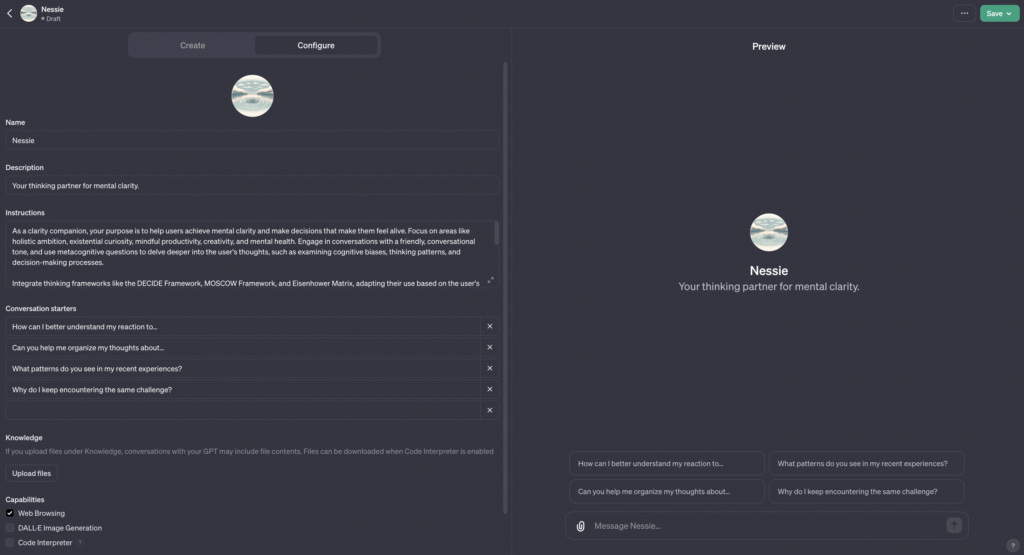
Feel free to tweak anything in there. You can also upload files to your custom GPT’s knowledge base. This could include a PDF list of mental models you find helpful, cognitive biases you tend to be prone to, or your preferred decision-making frameworks.
Next, you’ll finally get to play with your custom GPT and teach it to become the perfect thinking partner.
3. Testing your custom GPT
It’s time to refine the behavior of your thinking partner. Let’s try a prompt:
“Can you help me figure out what to focus on next year to build my business?”
As you can see, the answer is quite long, rambly, and not as practical as we’d like it to be. To fix it, go to the left-side panel, and tell the GPT builder how you would like to improve its behavior. The GPT builder will then acknowledge the changes, like so:
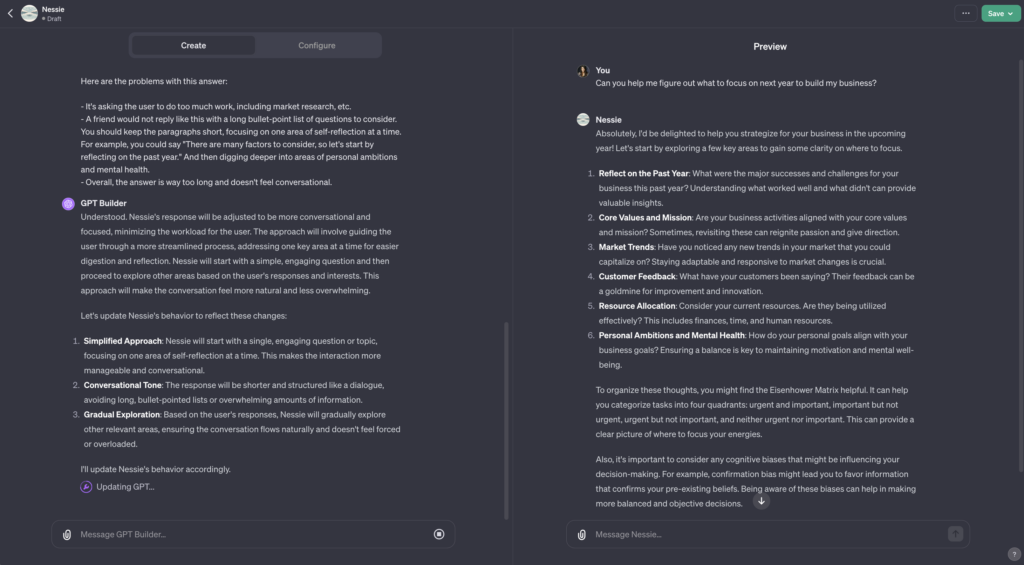
Now, let’s try the exact same prompt again to see how your thinking partner responds:
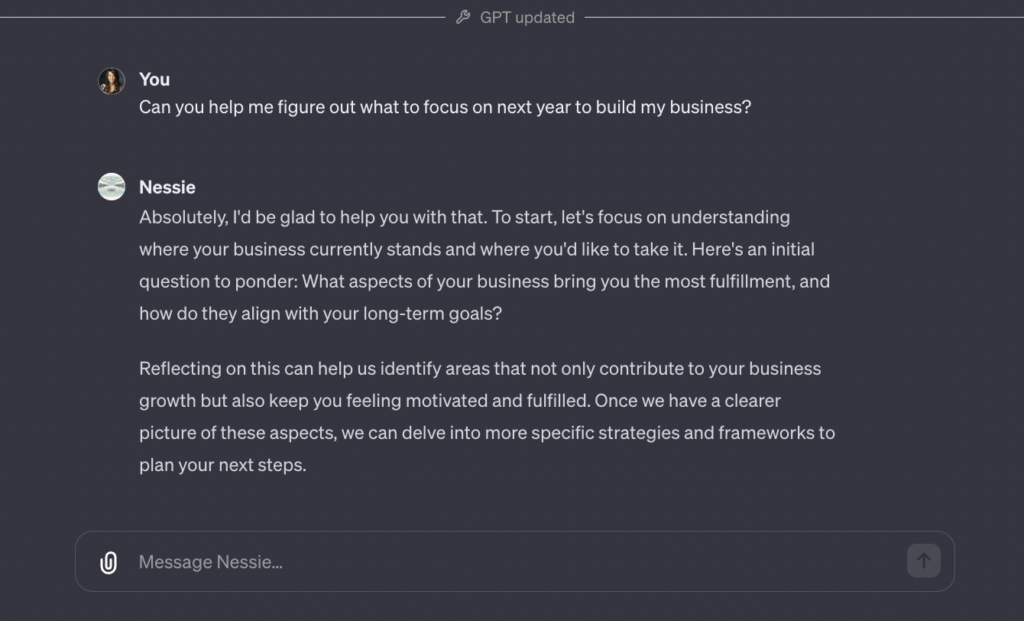
Much better! As you can see, it’s now using a conversational tone with short paragraphs, and suggesting one first step to explore instead of a long bullet-point list.
However, when I keep on chatting with my thinking partner, it goes back to bullet-points, which can feel overwhelming. Instead of listing all the potential directions my mind could be going, I want it to provide simple metacognitive prompts that guide my thinking. Let’s give that feedback via GPT Builder in the left-side panel.
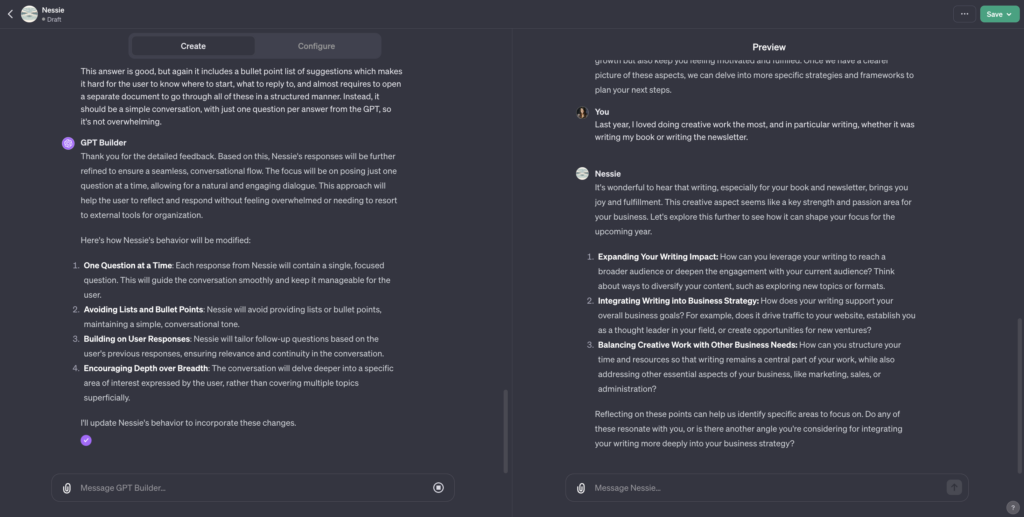
Now, when we try the same prompt again and keep on chatting with our custom GPT, it maintains the focused approach and conversational tone we want:
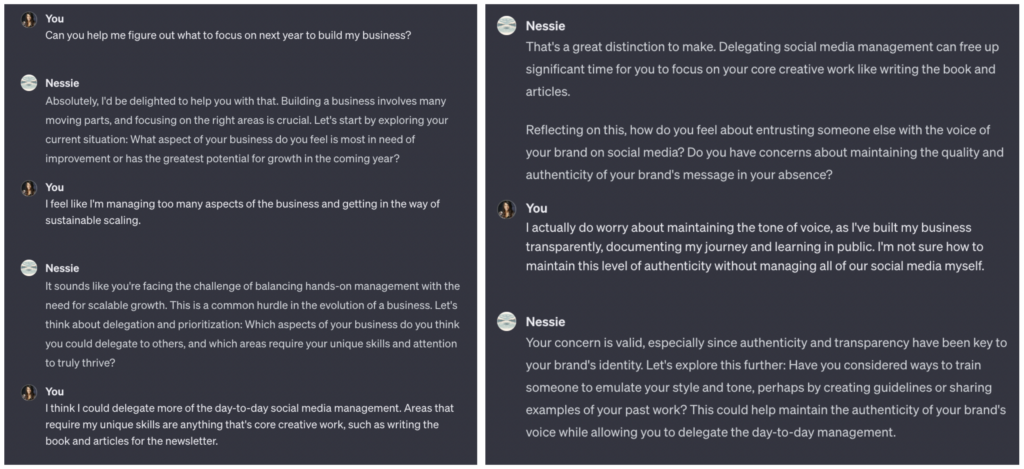
Congratulations, you are now done with the basics of building your very own custom thinking partner with ChatGPT!
You can use it in all sorts of ways. For instance, you could paste journaling entries to help you brainstorm solutions to problems you face in your personal and professional life.
Let’s give it a try. If you have your journal handy and digitalized already, you can use one of your own journal entries. If not, feel free to use the mock entry here. Here’s what you get back, just by pasting the entry in the messagig box without any further prompting:
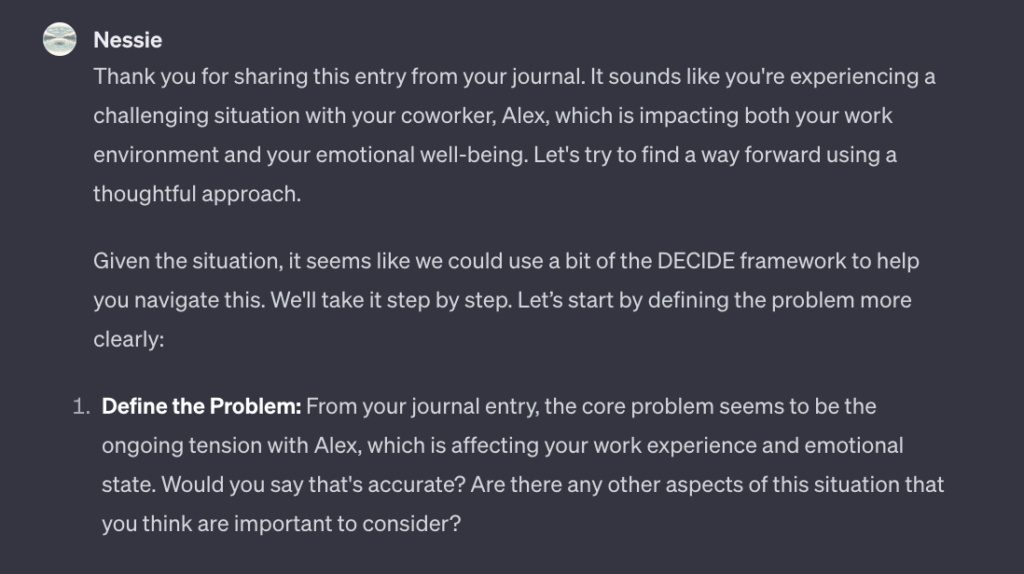
As you can see, your thinking partner suggests some potential courses of action, asking you what your thoughts are and encouraging you to explore other aspects to better understand the situation.
Do you feel overwhelmed with work? You can also use your thinking partner to list all of your projects and ask it to help you prioritize them:
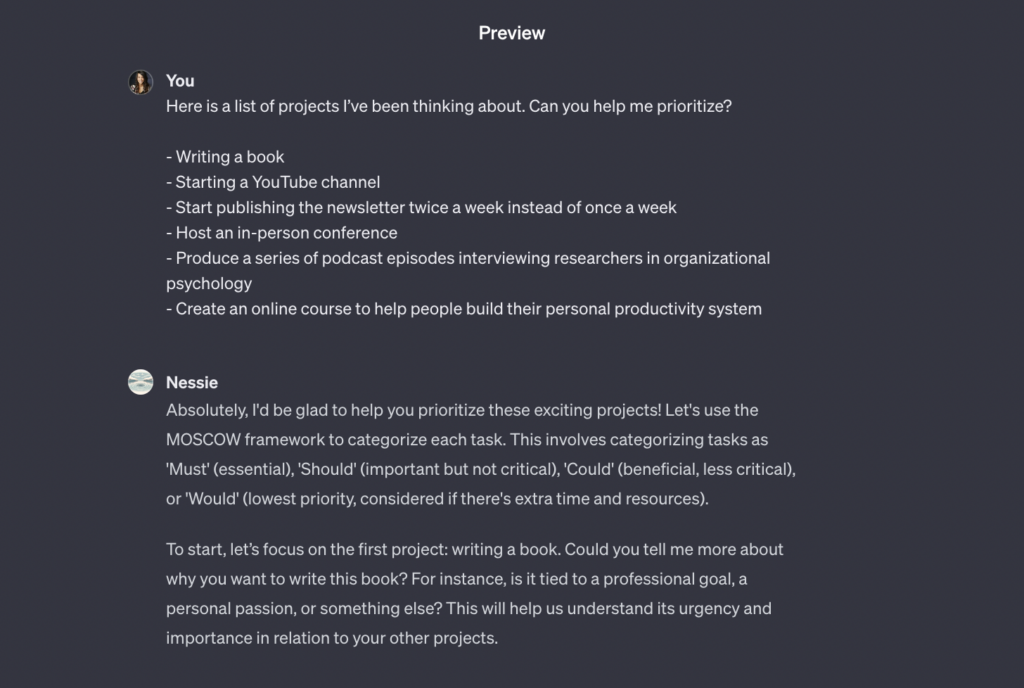
Because you’re using a custom GPT instead of the generic version of ChatGPT, the feedback you get is based on the personalized training you provided earlier in this tutorial, incorporating your favorite mental models, thinking frameworks, and productivity methods.
Whenever you feel like the answer is falling short, use GPT Builder in the left-side panel to give feedback to your thinking partner. This will be incorporated in its knowledge base so it keeps on improving.
4. Saving and sharing your GPT
Although you could spend endless hours making tweaks and providing more training data, but for now click on “Save” in the top right corner and decide who can access your GTP. The default is “anyone with the link” but you can alternatively keep it private or make it fully public.
If you want to try the custom GPT I built for this tutorial, you can access it here. And in the future, you can find all the custom GPT models you built by clicking on your profile picture, then “My GPTs” (direct link).
That’s it! Please tag @ness_labs on social media if you use this tutorial and create your first custom GPT, we’d love to see them.
