By this point, most of my readers know how much I enjoy using Roam for research. But many messages I get are about how to get started. People are convinced this is an amazing tool for note-taking, thinking, and metacognition, but the interface can be a bit confusing at first. So here is my super-simple beginner’s guide to Roam Research. It’s nothing advanced, and you’ll need to poke around to do more complex stuff, but I’m confident it will be enough to get you to understand its beauty.
To make the most of this tutorial, you’ll need to have a research topic in mind. I’ll prompt you again later to think about it, but the more interesting the topic is to you, the more you will enjoy your first experience using Roam. If you’re not feeling inspired today and still want to go through this tutorial, here are a couple of topics I used myself:
- Consciousness
- Black Death
- Growth mindset
As you can see, these are topics large and complex enough to give you lots of opportunities to wander around and create new pathways. Whatever topic you choose for this tutorial, make sure it’s broad and feels exciting to you.
1. Sign up and create your database
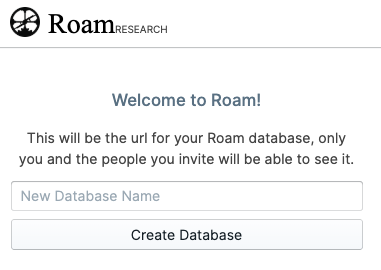
The first steps are fairly simple. Just sign up at roamresearch.com with your email address.

You will then be asked to create a database. Mine is called “nesslabs” after my company but you can call yours whatever you want. I’ve seen quite a few people use their Twitter handle as the name of their database.
All done with the technicalities. Now let’s focus on the actual research, content, and thinking.
2. Create your first page

Once you’ve created your account and your database, you will be greeted by the home screen which will become your base as you keep on using Roam. Let’s break it down.
- Left, the navigation menu.
- Daily notes. A new journal entry gets created for each day you click on that link. It will be auto-populated with the current date, and can be used as any other page. I’m going to completely ignore this type of page for this tutorial.
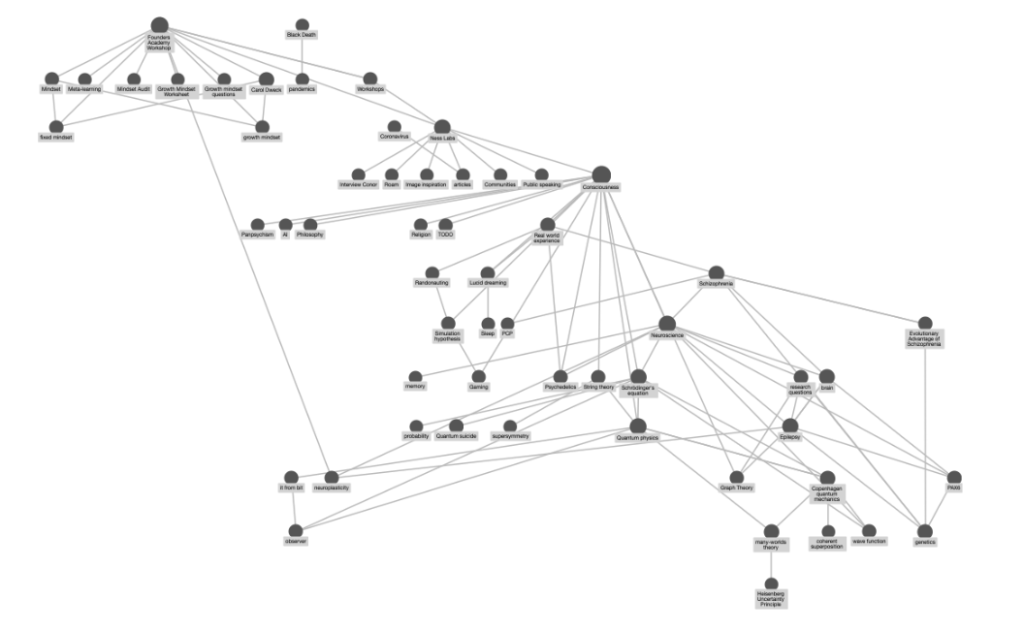
- Graph overview. A visual representation of all of your pages, connected to each other in a mind map fashion.
- All pages. A list of all of the pages you created, organised by recency by default.
- Shortcuts. A section with all the pages you added to your favourites.
- Top-right corner, the magic bar and the three-dot menu.
- Use the bar to search or create a page. Type some words there, if the page exists it will show up, and if not you can press enter to create a new page.
- The three-dot menu next to the magic bar gives you access to extra functionality, such as exporting your data or sharing a specific page.
- Bottom right corner, the help menu, aka your bible whenever you’re lost and don’t want to come back to this article.
- Click to access all the shortcuts.
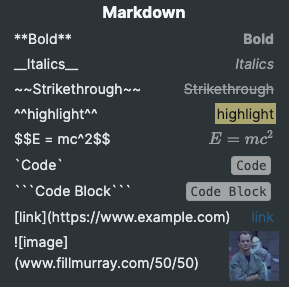
- It also includes a useful reminder of markdown which is used throughout Roam.
Take a couple of minutes to identify each section I just described. It won’t take long but it will make the rest of your experience so much better.
Now that you know your way around, create a new page. If you’re not feeling inspired and don’t want to pick one of the topics I suggested earlier, let’s call this page “Cats”. Broad and interesting enough. There are several ways to create that new page.

- Hover your mouse over “all pages” and click on “+” then name your new page
- Use the magic bar in the top-right corner by typing the name of the new page you want to create
- (advanced option: ignore this one for now, but you can create new pages from other pages by using special links which we will talk about in the next step)
Okay, first page created. Now, let’s add some content to it and let’s start shaping our mind-web.
3. Connect the dots
Every page in Roam is made of what looks like bullet-point paragraphs. But these are much more than that. They are blocks you can refer to from other pages. I know it’s going to sound boring, but I want you to follow the exact steps I’m going to outline here so you can see how powerful Roam can be.
First, go and look up your topic—I’m going to go with the Black Death here, but pick whatever piques your interest. Click on the corresponding Wikipedia page. Copy and paste a paragraph into Roam giving a good overview of what your topic is about. Then, with your cursor, highlight a keyword—a word that’s related to your topic and appears in the text—and type [[ while keeping the text highlighted. Now, click wherever else on the page.
You will see the keyword turn blue—meaning you have successfully created a new page just by adding brackets around this keyword. With these three simple steps, you have imported content you read online and created your first link between two pages.
Let’s take it up a notch. Whatever keyword you picked (I picked “pandemics” but if you went with “cats” as your main topic you may for instance want to go with “felidae” as a keyword), look it up, and copy and paste something on that new page. Now, choose a sentence you find interesting, select it with your cursor, and press CTRL+H or CMD+H. This is the command for highlighting.
Boom, your text is highlighted.
Okay, I don’t want to push you too hard, but let’s try one last trick. As in many editors, “tab” will get you to move the cursor to the next tabulation, and “maj + tab” will get you to come back. The one trick you need to know about is that clicking on a bullet-point makes you open that particular block in its own space so you can edit it with your full focus. Perfect when you have a long page with lots of different sections.

Remember, every other command is available to you by clicking on the question mark icon at the bottom right of the screen. It includes strikethrough, bold, italic, code blocks, links, and more. I will let you explore these on your own. You can also use this Roam cheat sheet to learn the most important ones.
And if a page is particularly important, you can always add it to your shortcuts by clicking on the “star” icon in the top right corner.

4. Embed what you need
Your pages don’t have to only be text. Let’s make it a bit more interesting by adding some media to this page. First, an image. Two ways to do this, either through a link or by uploading an image from your computer.
- If the image is hosted elsewhere, type 
- If the image is on your laptop, type / and scroll down to “upload an image”
This shortcut, “/” is the most important shortcut you need to remember. It will open a menu with all of your options. I’m not going to go through all of the options—you can embed tweets, YouTube videos, and more—but I’ll share my favourite one, which I think is central to Roam. Remember how I told you each bullet-point paragraph is a “block”? Well, you can embed these.
Two ways to do this:
- Type / and scroll down with the down arrow to select “Block Reference”
- Type (( and type to select the block you want to reference
That’s it! So far, you’ve learned how to create new pages, how to import content, how to connect nodes together. Very practical stuff. But the power of Roam lies in its ability to let you explore your thought-processes in an organic way.
5. Explore your mind
And now, the last magic trick that might make you fall in love with Roam… Bi-directional links. Each page will suggest other pages that are related based on keywords—you will find these suggestions at the bottom of each page you created. And you can decide to link these pages together or not.
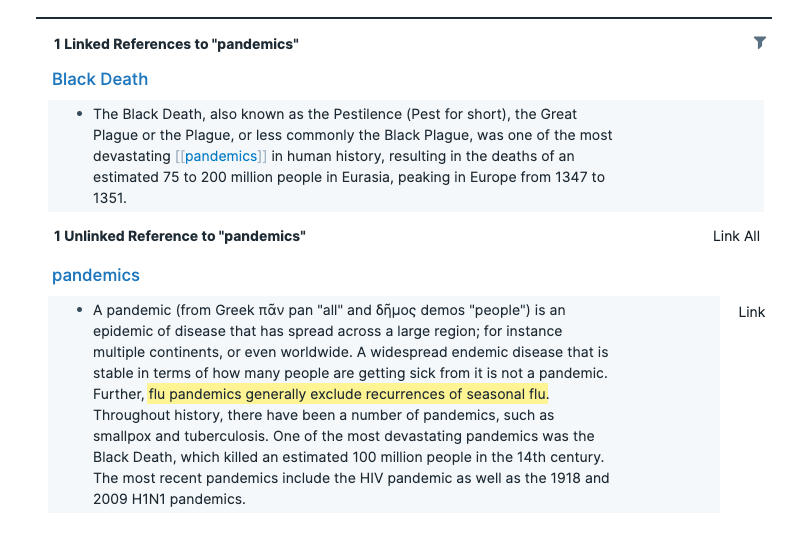
It’s all about bi-directional curation. Do this for a while, and Roam will automatically create a graph connecting all of your research topics and thoughts, which is really fun to grow and explore.
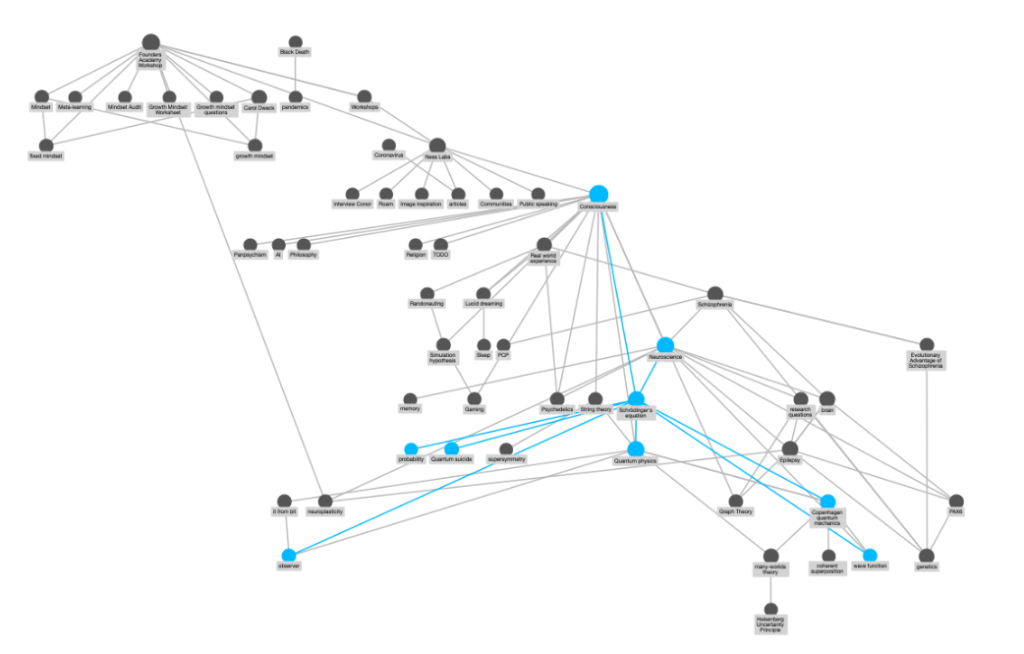
Click on any node to highlight all the pages connected to that topic, and double click on it to open the corresponding page.
There are many, many ways to use Roam. I have listed a few in this article and the founder recorded a few demo videos. This guide is just a very simple “how to get started” manual. But Roam is your oyster. If you have more questions, the FAQ may be helpful.
I also built a little extension you can install to make it easier to import text snippets from articles you read online into Roam. It works with any browser and takes two seconds to install. And if you’re feeling creative, you can even style Roam to your taste.
When you’re ready to take it to the next level, learn how you can go from research idea to original article with Roam.
P.S. Want to go even further with Roam? Join Roam Essentials, a short course to master 20% of the features that will unlock 80% of Roam’s power.