Want to write an original article but still at the idea stage? This step-by-step tutorial will teach you a simple method to go from research idea to original article.
One of the best ways to learn is through the generation effect. Creating your own material based on what you want to learn activates your semantic memory, and actively manipulating new information creates relationships between each item, facilitating the retrieval of information when it’s needed.
Roam Research is a tool powerful enough to manage an end-to-end writing workflow, from research and note-taking (input) to writing an original article (output). There are many videos covering some of the more complex use cases for Roam, but in this tutorial we will focus on five simple steps you can take to go from idea to original article, all inside of Roam.
If you are not familiar with Roam, I recommend you first have a look at my beginner walk-through. As always with my Roam guides, you should pick a topic you want to explore before getting started. For the purpose of this tutorial, the topic should be broad enough that you can find quite a bit of content easily—the goal is to learn how to use Roam, not to learn how to look up obscure stuff online—and exciting enough that you’d want to write an article about it.
Not feeling inspired? Here are some ideas you can choose from:
- Knowledge management
- Internet friendships
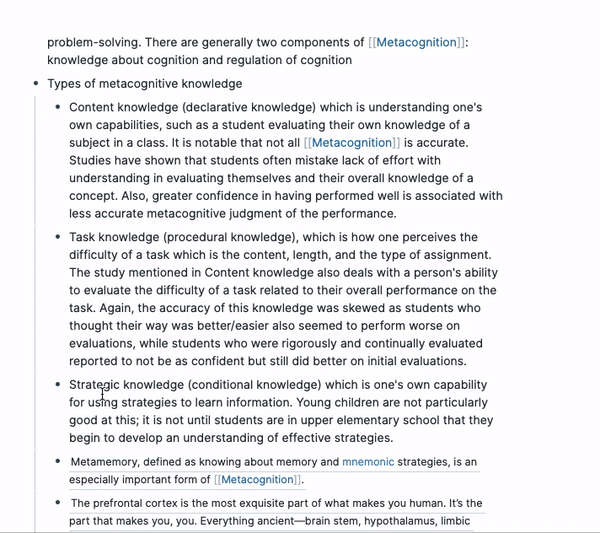
- Metacognition
Okay, you got your topic, you have a Roam Research account—again, if not, use the first-time Roam user guide first. You’re ready to go.
1. Create a page for your topic
Imagine you are an explorer. This page will be the hub you keep on coming back to. Let’s say you chose “metacognition” as your topic. Create a new page with that name.
Then, add it to your favourites by clicking on the star button in the top-right corner. This will pin the page to the left-hand side menu so you can easily access it.

2. Collate your raw notes
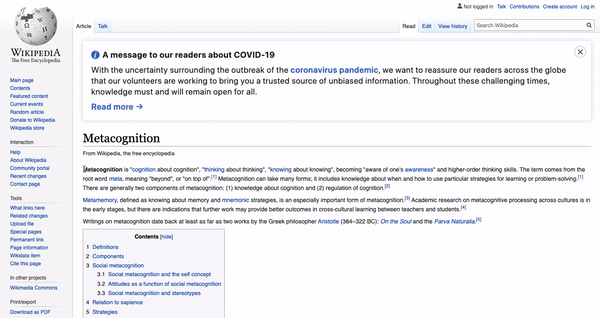
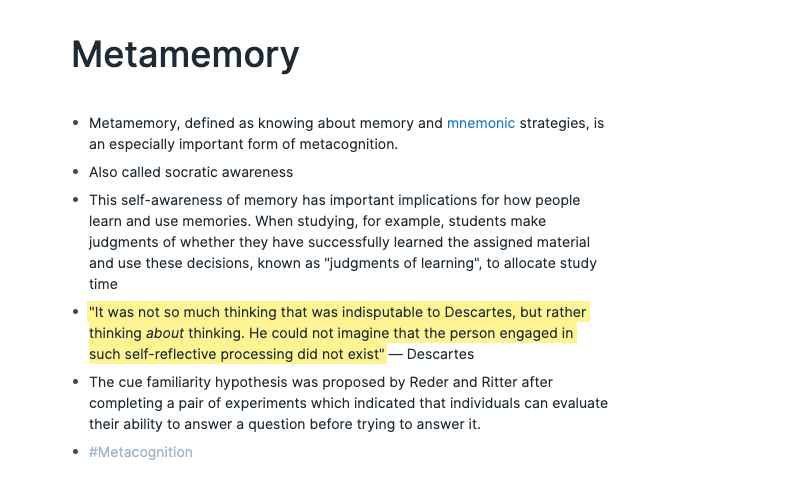
Now, go to your favourite search engine, and type in your topic. Open a few pages—it could be a Wikipedia page, a blog post, a research paper—and take your time to identify the nuggets of information you find most interesting and most relevant to your topic.
Copy and paste these nuggets into your hub page. One nugget should be one bullet point.
Sometimes, you will find a related topic that deserves its own page. That’s absolutely fine.
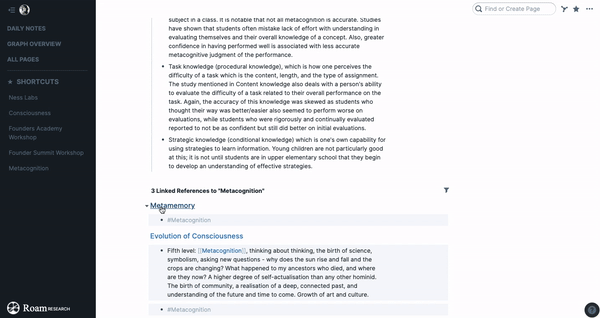
Create a new page, copy and paste your notes, and make sure to tag that satellite page with your topic. I usually do this at the bottom of the page. In my example, it would be #Metacognition (case sensitive!). This way, even if the specific word is not mentioned in the notes you copied and pasted, these satellite pages will be connected back to your hub.
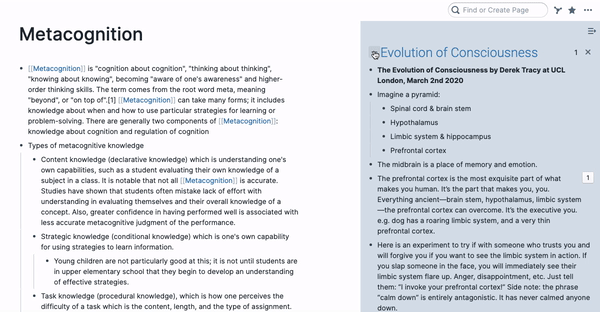
Here is an example of a satellite page. Notice the tag at the bottom (#Metacognition) linking back to the hub page we created.
The great thing is that these satellite pages will automatically show up under the hub page. As you will see, it will be very useful later. But for now, you are just collecting nuggets of information. Copy and paste to your heart’s content, and make sure that all satellite pages have a tag linking back to the hub we created earlier.
Your research can happen over a long period of time. See something interesting on Twitter? Add it to your hub. Read an article that’s relevant? Create a dedicated page, take notes, and link it back to your hub with the right tag.
Once you feel like you have enough rough material, it’s time to structure your notes so you can start writing an original article.
3. Structure your raw notes
You should now have a lot of notes, some on the hub page itself, and some in satellite pages. The goal of this step is to bring everything you need to the hub page and to structure it. There are going to be a few shortcuts involved, so hold onto your keyboard.
If you look at the bottom of your hub page, you should see the section with the list of all the pages linking back to this one—some properly linked, and some unlinked. Let’s start with the linked ones.

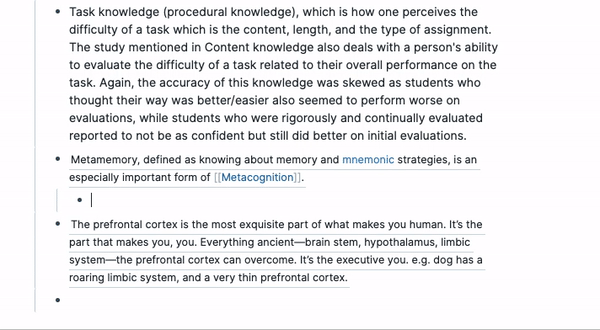
Hover over one of the page links, which are blue and bold. In my case, I’m going to hover over the “Metamemory” page. Use shift+click or CMD+SHIFT+O (CTRL+SHIFT+O) and click on the link. It will open in the sidebar.
Then, pick a block (a paragraph starting with a bullet point) in the right-hand side panel that just opened, place your mouse over the corresponding bullet point, and press the ALT key on a Macbook (CTRL on a PC) while you drag it to your hub page. It sounds like a lot of work, but it’s super simple.
See it for yourself.
If you’re the kind of person who likes to poke around, you will notice that you can drag these paragraphs from the sidebar without pressing the ALT key. What’s the difference?
When pressing the ALT key, you are adding a copy of the original block to your hub. It means any change you make to the copy will be reflected everywhere in your Roam database. It’s the same block, displayed in two different places.
When you’re just holding and dragging the bullet point without using the ALT key, you are moving the block—effectively removing it from the original page.
If you’re confused, drag a block with and without holding the ALT key, and you will see the difference.
Okay, but why limit yourself to linked pages? You can do the exact same thing with unlinked pages. This section will resurface content you didn’t think about proactively including—relevant blocks without a tag linking back to your hub. Roam is making these connections for you.
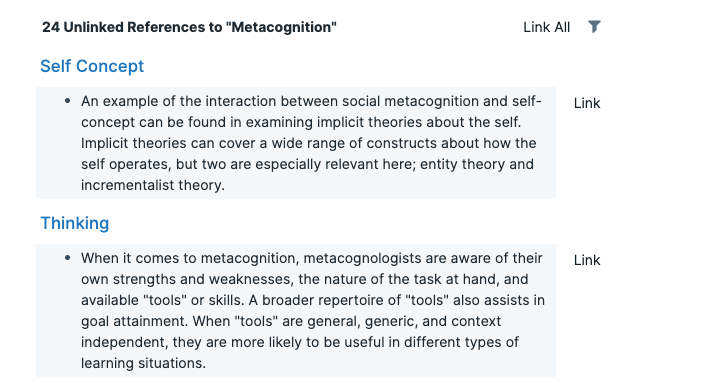
Explore these unlinked references the same way: using the shift+click or CMD+SHIFT+O and click (CTRL+SHIFT+O) shortcut to open them in the right sidebar, and dragging whatever nuggets you think will be useful to your hub.
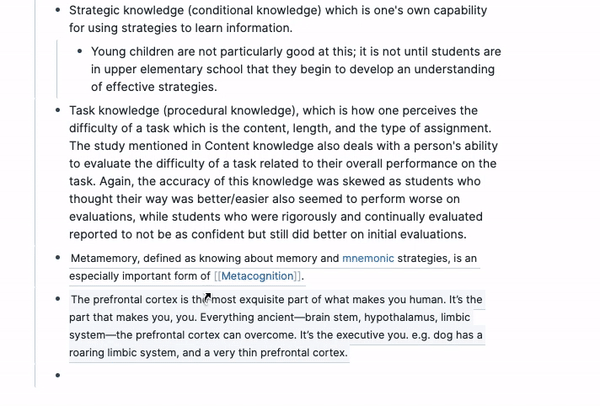
Feel free to reorder the bullet points in the hub area. Create sections and subsections. Try to shape a rough content plan.
After a while, you may feel like that’s a lot of different pages to navigate. You can actually expand or minimise pages in the right sidebar by clicking on the + or – buttons.
And when you’re lost, you can come back to your hub by clicking on the link in the left sidebar—which, remember, you created by adding that page to your favourites.
What you are doing in this section may feel messy—but you are effectively moving your raw notes from the right panel into your main working area on the left. It’s very similar to how the brain works—moving data from your long-term memory into your working memory.
Don’t worry about the phrasing of the content itself, at this point it’s more about moving things around so you can create an overall structure for your article.
4. Start writing
Onto the fun part. You now have a structured collection of notes. Each bullet point is an idea. You just need to take them and rephrase them using your own words.
If you have been using the ALT key when dragging blocks and want to keep a link to the original source, you can use this advanced trick shared by Conor White-Sullivan, the founder of Roam. Transform the block links ((block-code)) into regular links [*](((block-code))) which will create an asterisk linking to the original block.
Or you can just remove the imported blocks once you’re done rephrasing them. That’s my preferred way of working on an article, as I include the source in the final copy itself and I usually don’t feel the need to revisit the original block once I have found a good way to put it into my own words.
Rephrase each paragraph, move them around, and shape your article until you’re happy. You’ll have a beautifully structured article, but you’ll still be one step away from publication.

5. Export your article
Roam pages are made of a bunch of blocks which visually look like bullet points. You can move them around, copy them, export them, edit them. But when it’s time to publish your article on a blogging platform or somewhere else, it can be a bit frustrating.
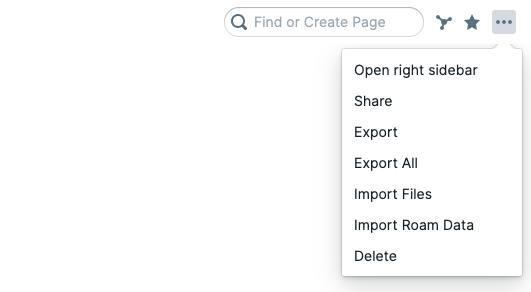
If you want to export your draft, click on the three dots in the top-right corner, then “export” and choose the markdown option. You’ll get a zip file.
If you’re using a markdown-based publication tool, unzip the file and you’re good to go. If you’re using an HTML-based or a WYSIWYG tool, you will want to convert the file.
Head to Cloud Convert. You can convert the markdown file to HTML, DOCX, PDF, and more. I personally export to DOCX and then import into Google Docs to remove the bullet points and for final touchups before publishing to WordPress.
That’s it! Once you’re done with an article, you can remove it from your favourites.
If you want a more visual tutorial, check out this video by Conor. It includes extra tips such as how to check what references and raw notes have been included in your final version. It’s a bit more advanced, but a great watch if you want to see an end-to-end workflow.
And if you want an easy way to import text snippets from articles you read online into Roam, install this little extension I built. It works with any browser.
This was a very simple guide to go from idea to original article, and I left out some of the more advanced tricks you could use. Once you feel comfortable with these steps, start exploring and building your own workflow. Roam adapts to how you think, not the other way around.
P.S. Want to learn how to make the most of Roam? Join Roam Essentials, a short course to master 20% of the features that will unlock 80% of Roam’s power.